Three different toolkits, namely Seurat (R/RStudio), Bioconductor (R/RStudio) and Scanpy (Python/Jupyter) are available to perform the scRNAseq analysis. The labs can be run on SciLifeLab Serve or on your local machine using Docker. Both options provide the necessary environment to run the analysis.
If you use SciLifeLab Serve, you do not need any local installation or setup on your system but you need a SciLifeLab Serve account. If you use Docker, you will need to set up and run Docker yourself.
1 Option A: Run labs on SciLifeLab Serve (Recommended)
- Log in with your university email account to SciLifeLab Serve.
This step requires that you are registered, and your account was given access to the course materials. If you did not register yet, please follow the precourse information and send an email to serve@scilifelab.se and let them know that you completed the registration.
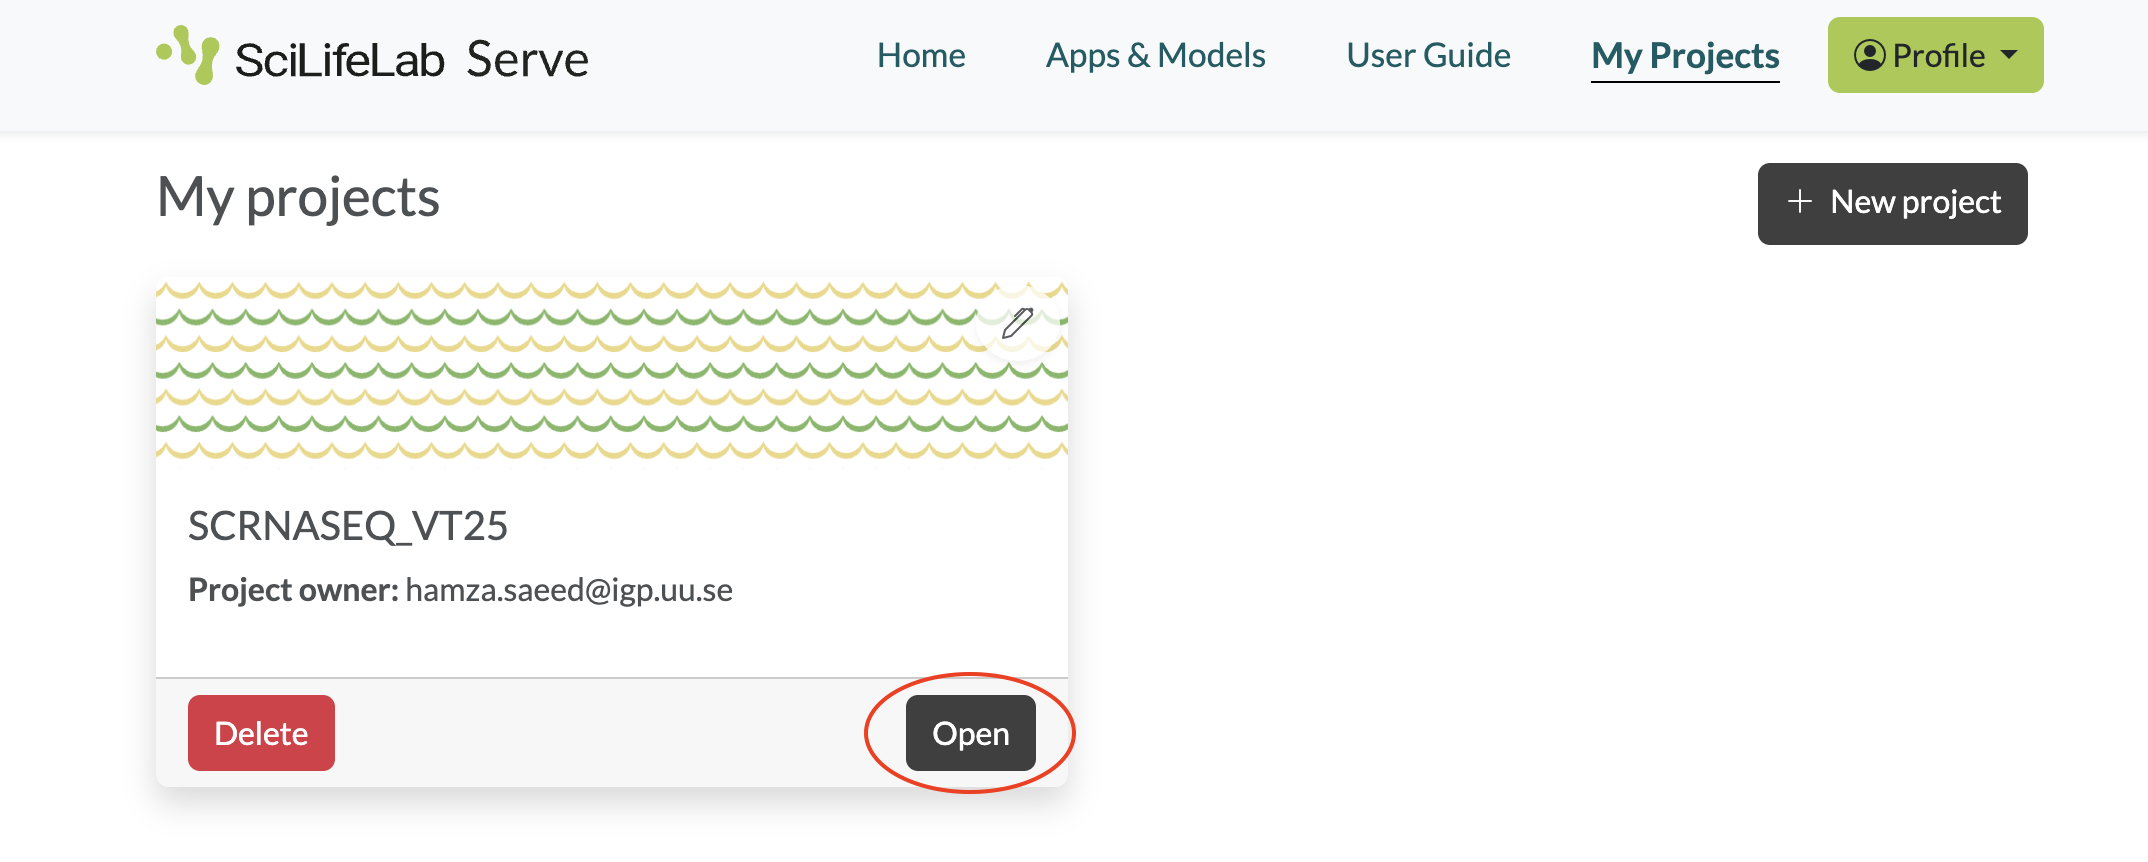
- Select My projects from the main menu. You should see a project called SCRNASEQ_VT25. Click Open.
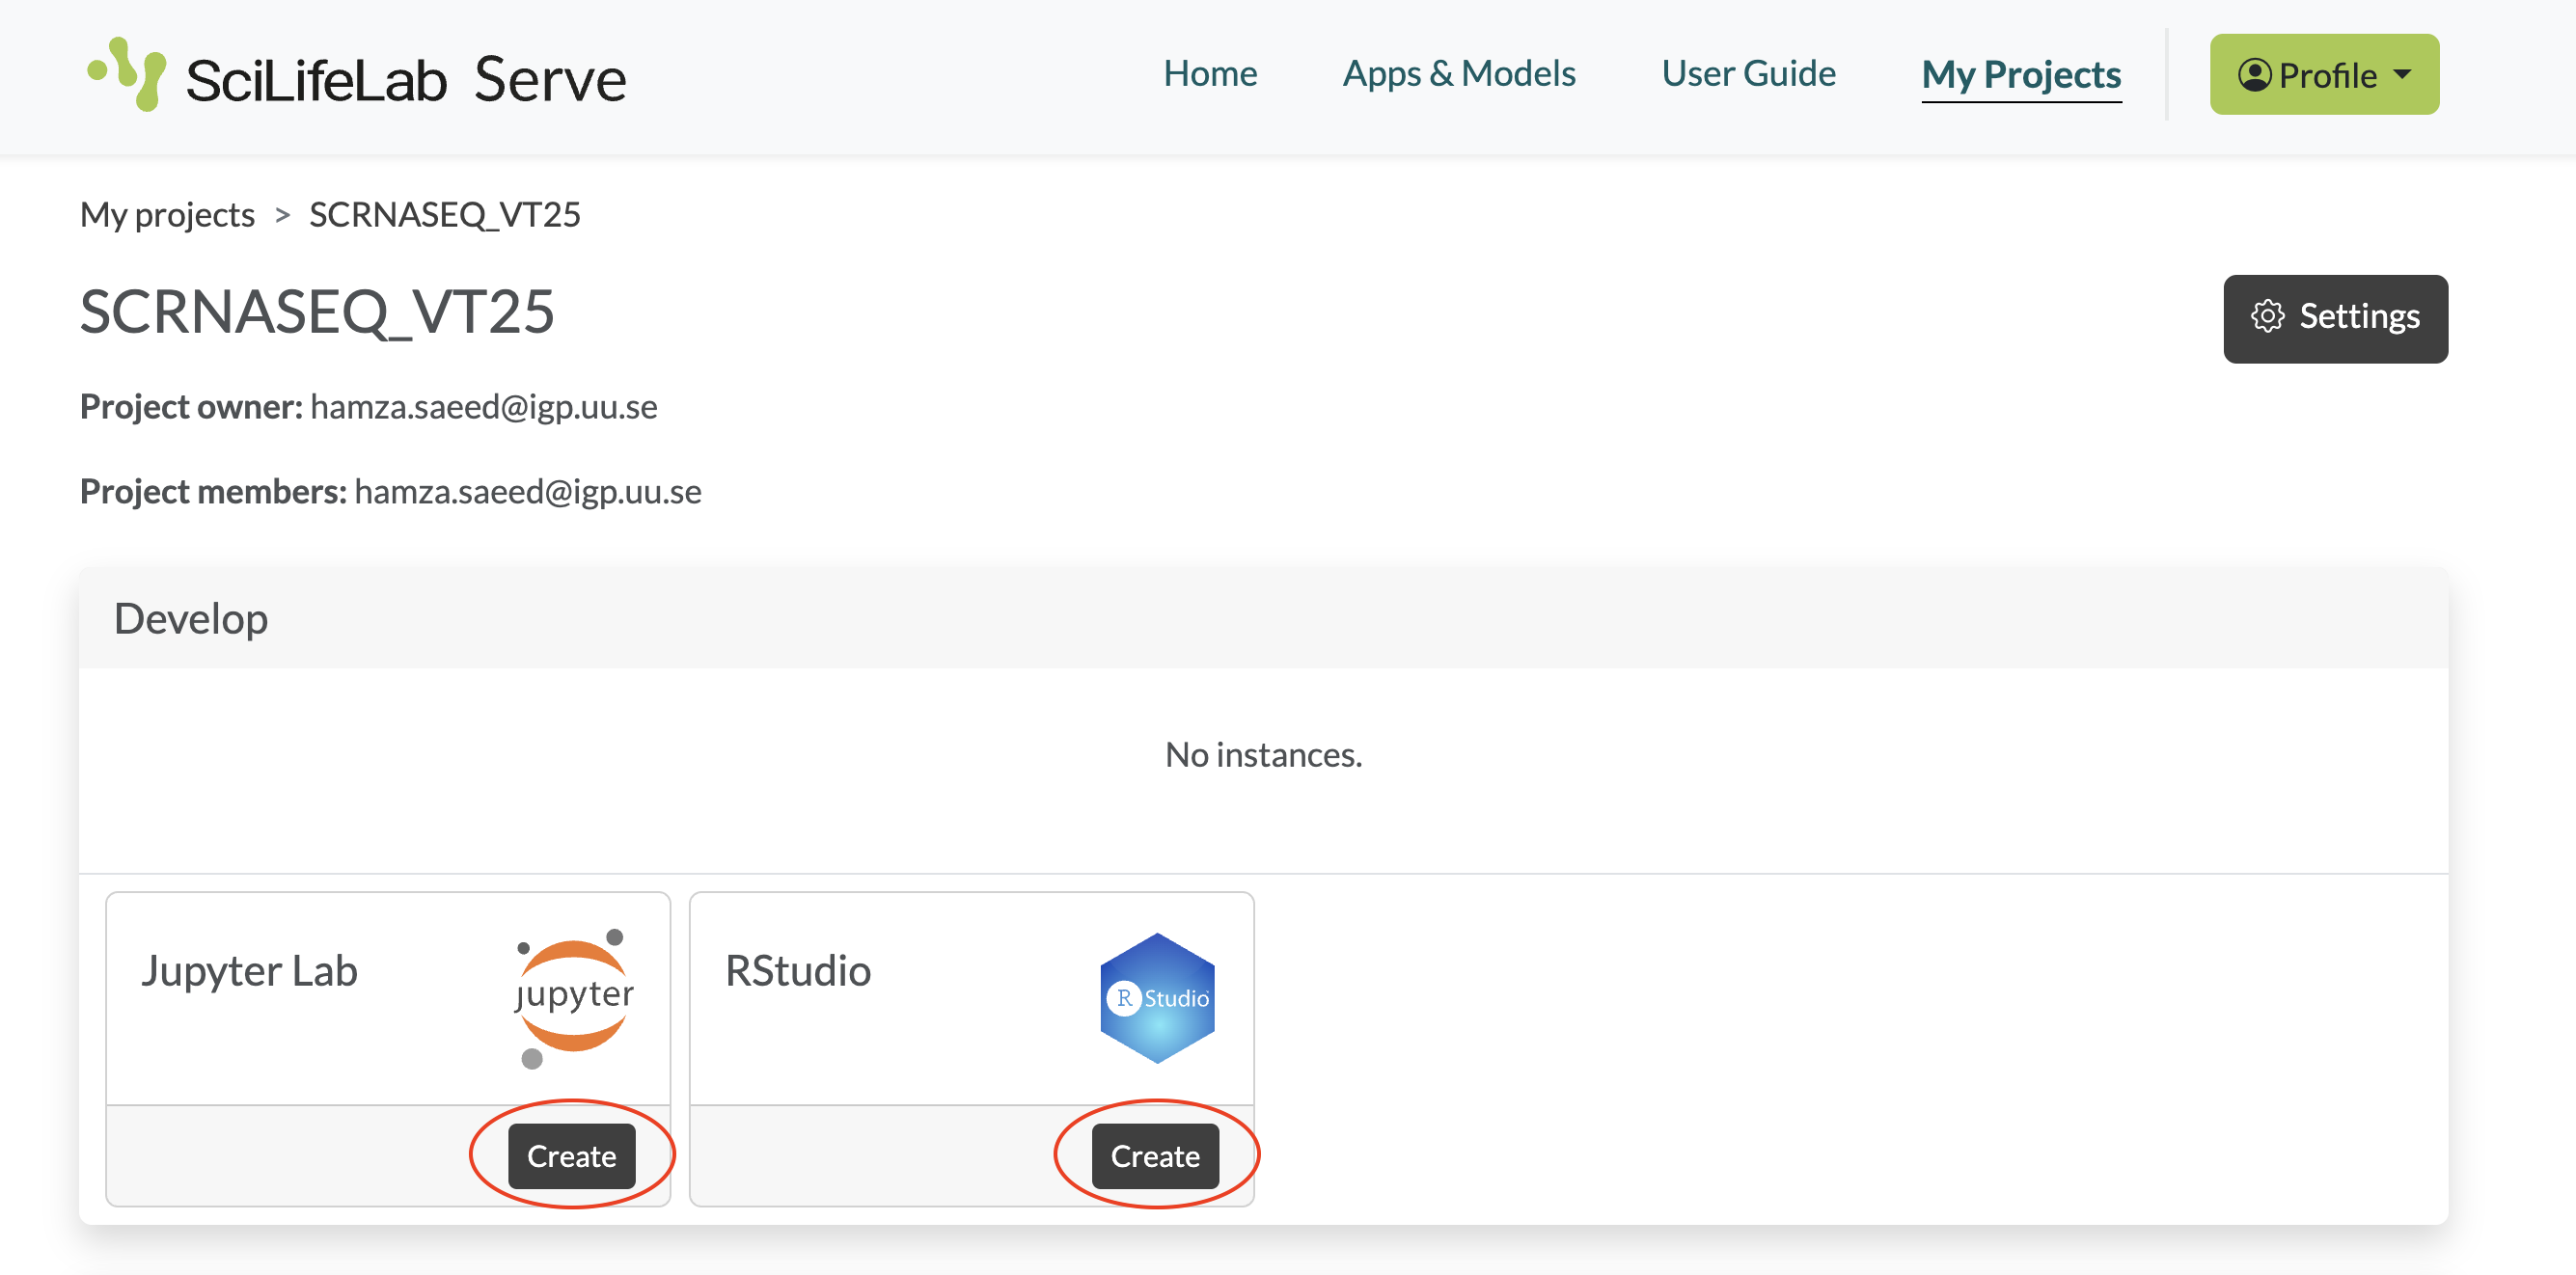
- In the SCRNASEQ_VT25 project, you can create an RStudio (for Seurat/Bioconductor) or JupyterLab (for Scanpy) notebook server instance, depending on which toolkit you choose to work with, by clicking the Create button.
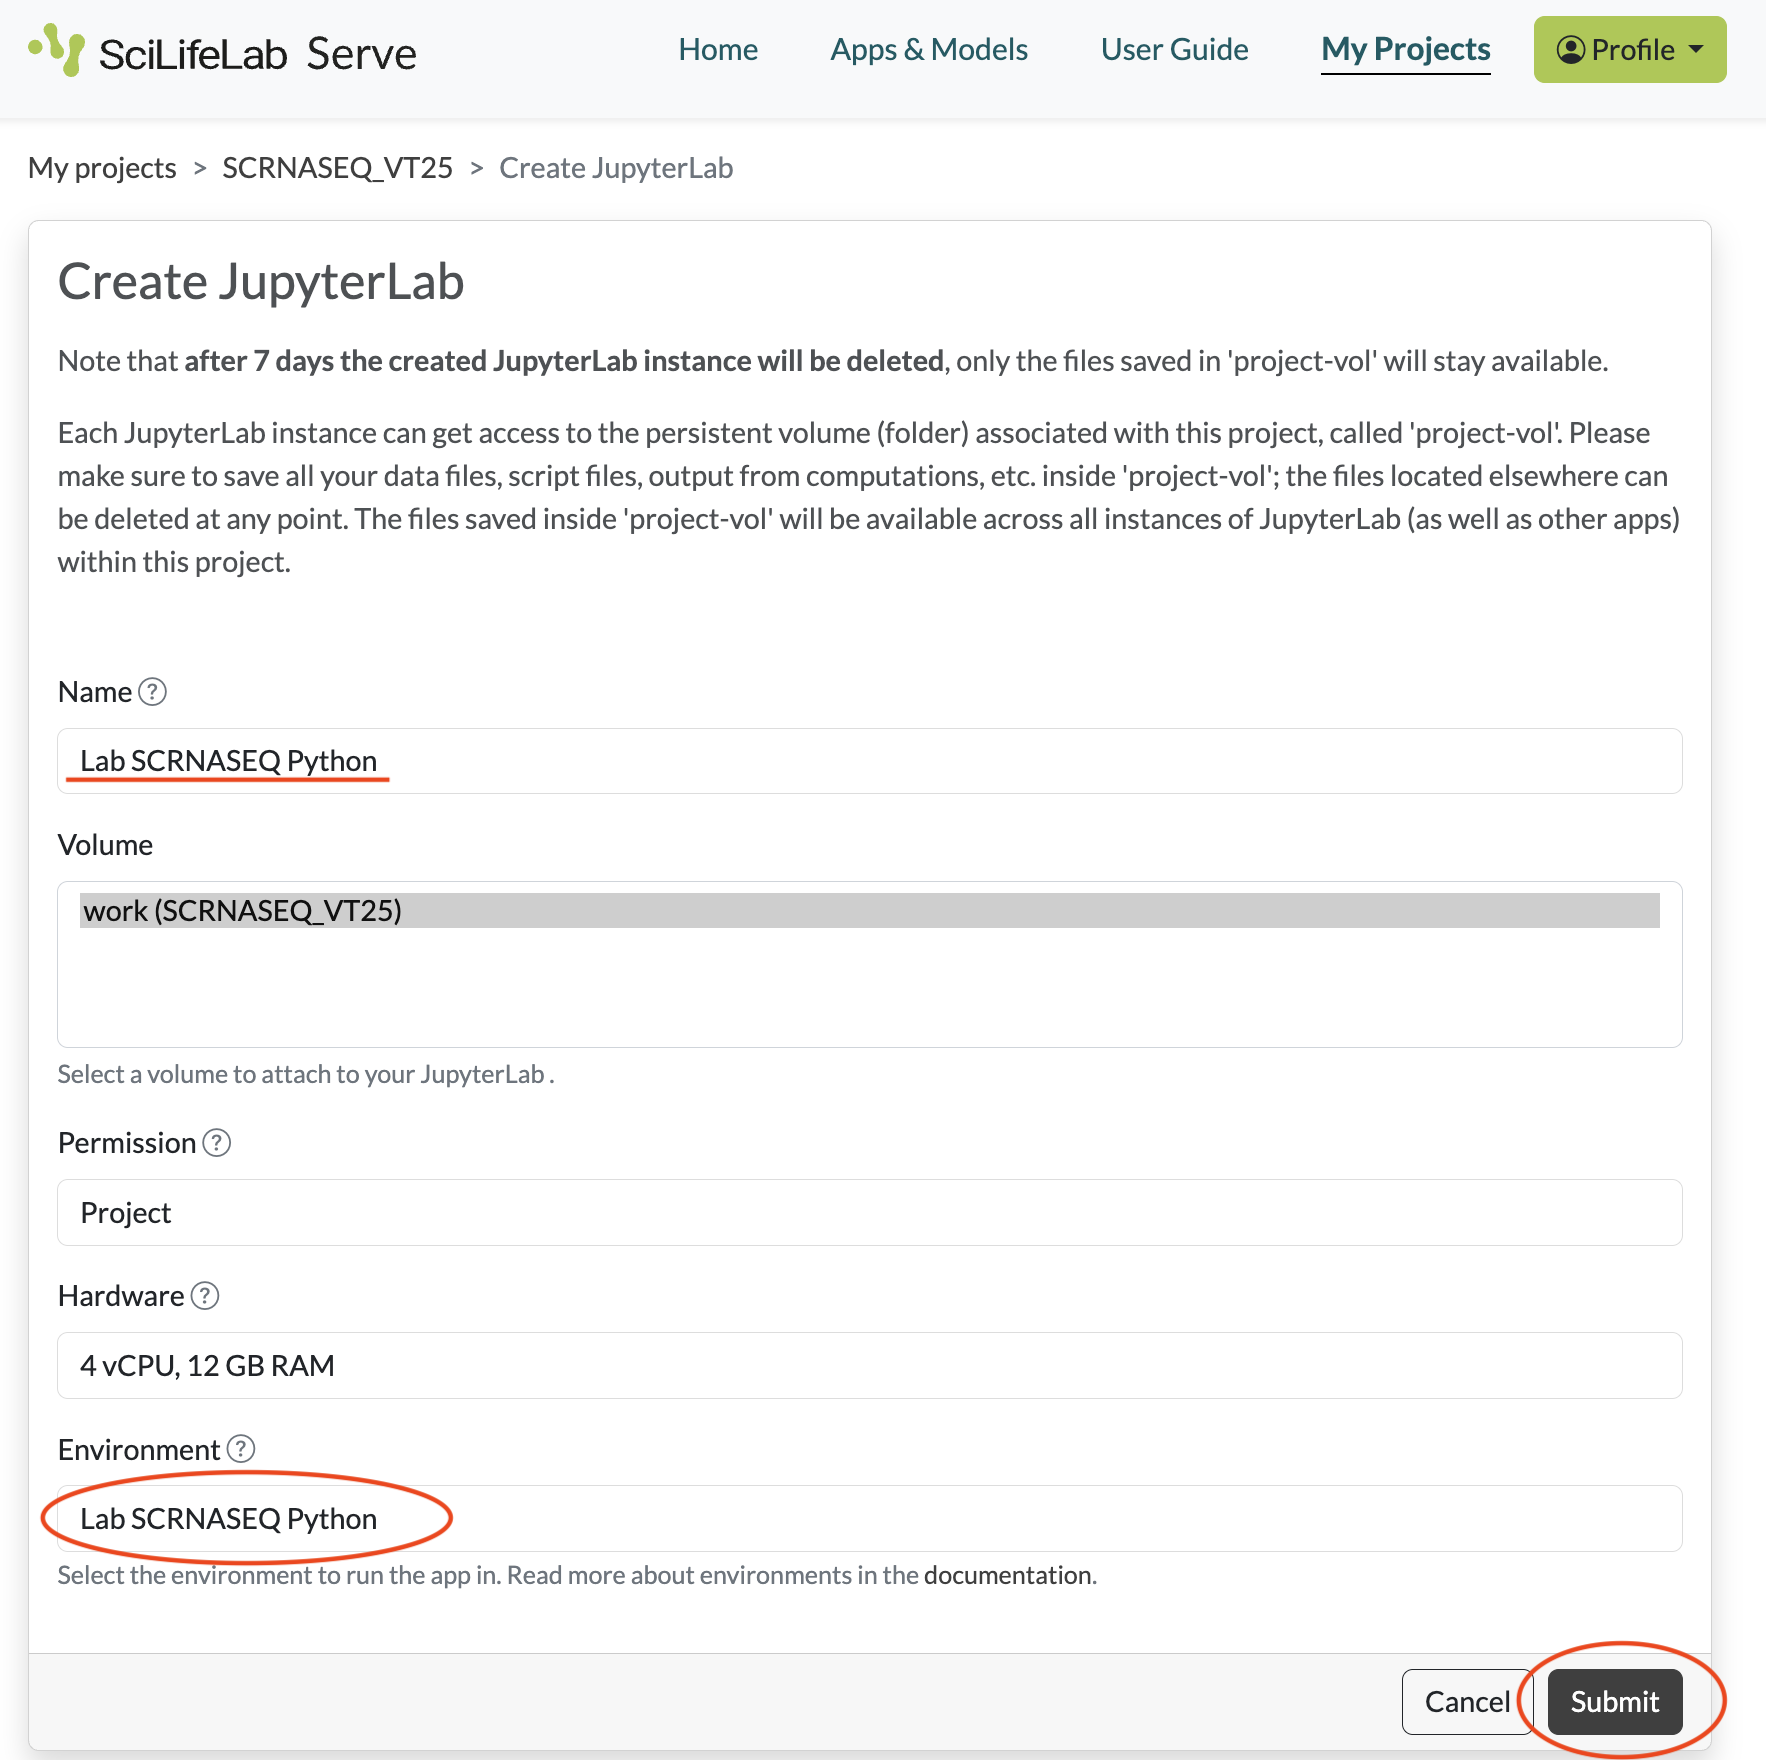
- You will now see a form to configure a notebook server. Under Name put the name of your choice, e.g. the toolkit. Leave the rest of the fields unchanged. Now click Submit.
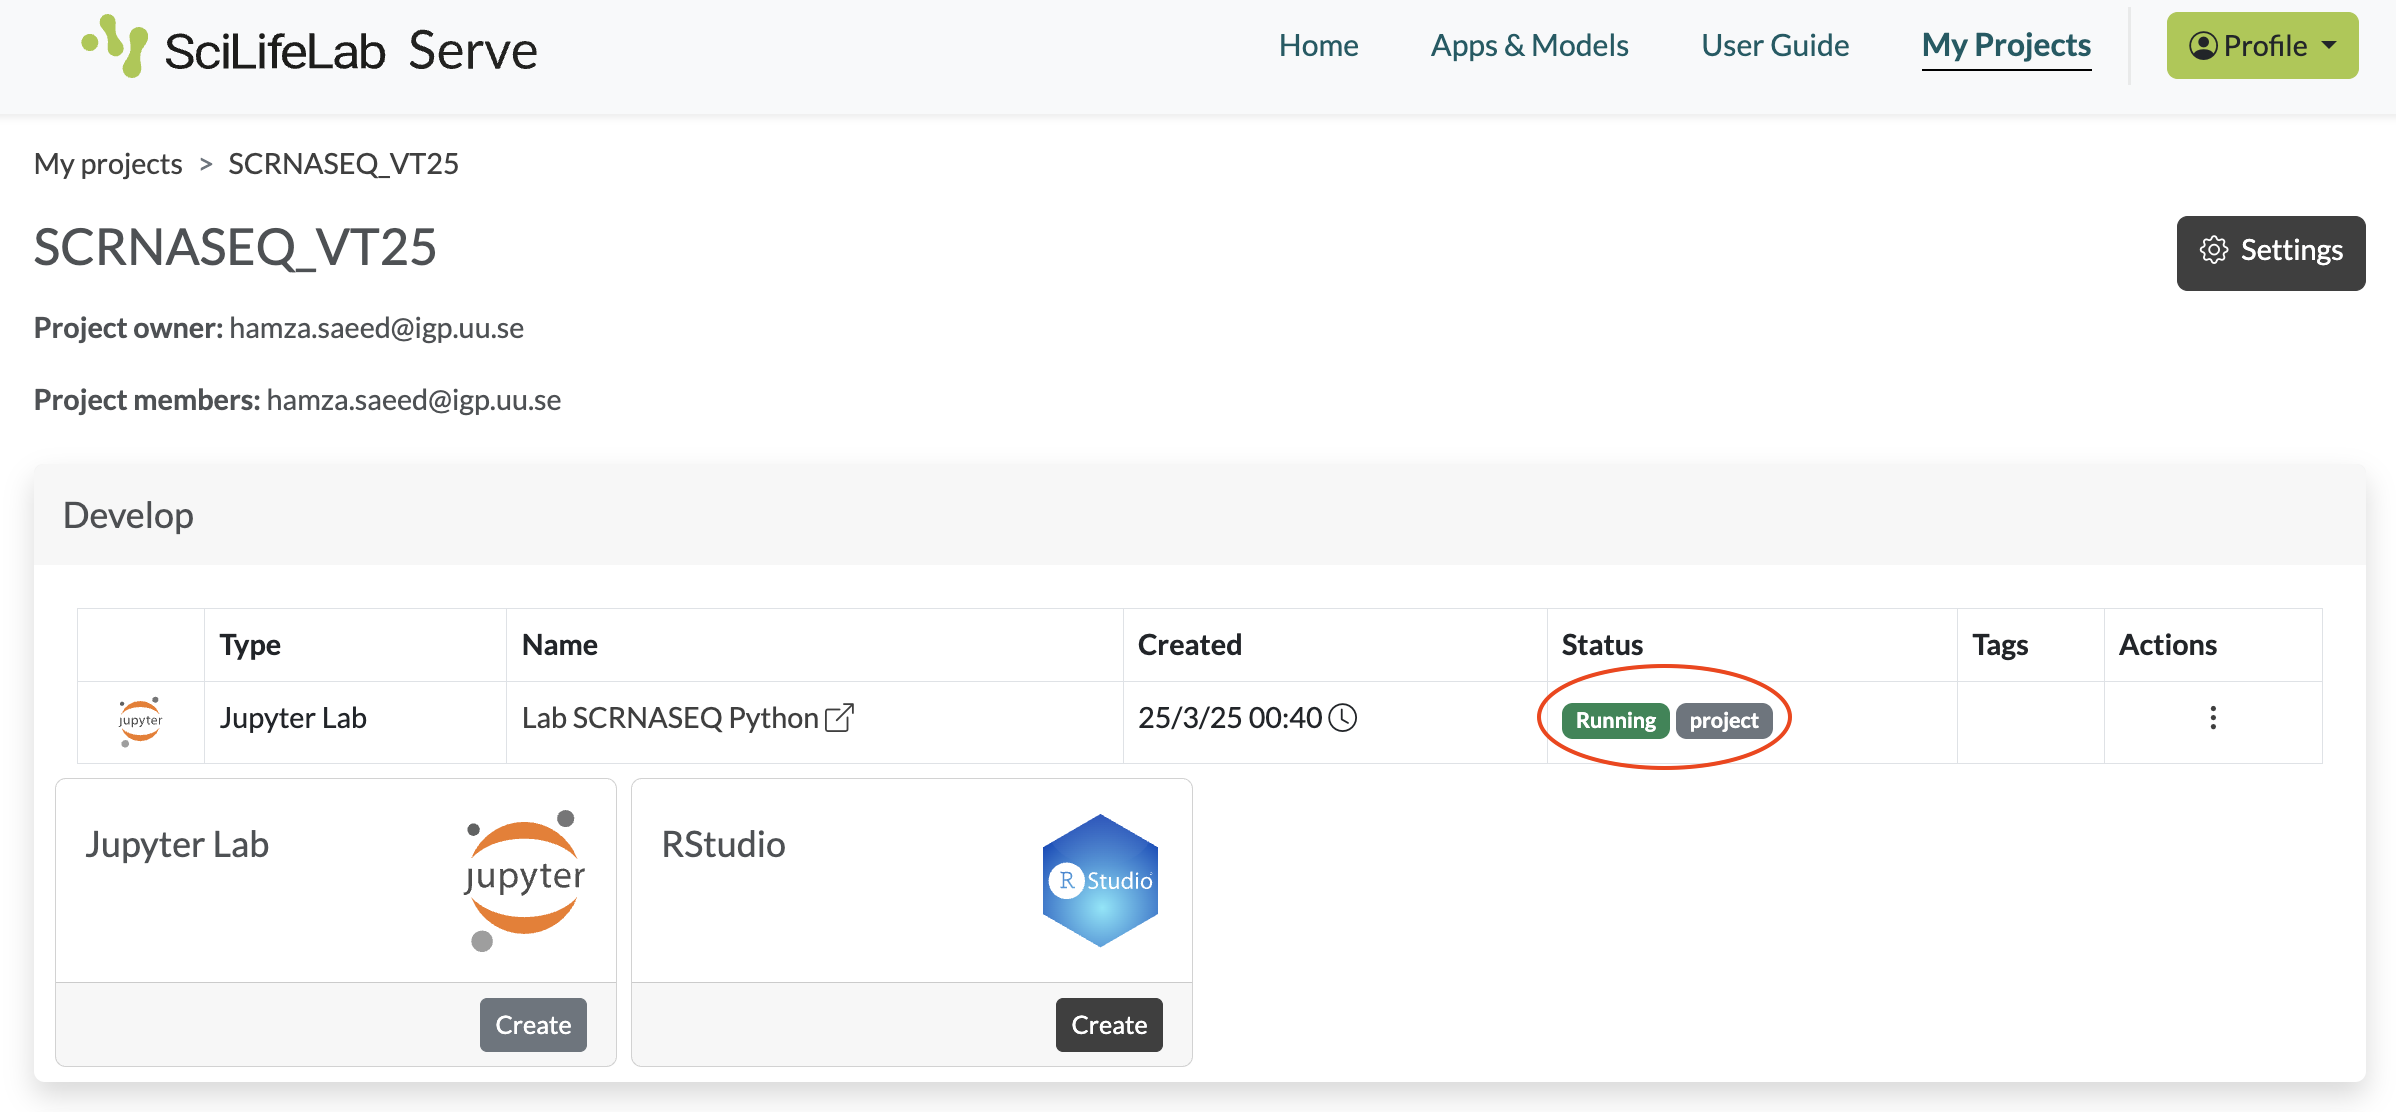
- The notebook server will now be created for you. Wait a few minutes to see the status Running in green. You can now click on its name to open it in a new tab.
For JupyterLab you will need to use the password scrnaseq.
If the status does not turn to Running within 5 minutes click on the three dots under Actions and then Delete. Wait a few minutes until you see the status Deleted. Now you can refresh the page and create a new instance starting from step 3.
In rare cases it may happen that your notebook server suddenly restarts. This could be due to an error that affected the notebook globally (for example, it ran out of temporary memory). You will see this on the page where you are working. A new notebook will start for you at the same URL within a few minutes.
In the case of both JupyterLab and RStudio you have access to persistent storage. This is mounted to the folder /home/jovyan/work. Files stored in this folder (NB: only in this folder) will be available even if a notebook suddenly restarts. You can also view, download these files or upload other files that will become visible in your instance through a File Manager that can be launched from the bottom of the Project overview page.
- Inside the notebook server the script
download-labs.shis provided that will download the corresponding labs. It creates alabsfolder with.qmdfiles (Seurat/Bioconductor) or.ipynbfiles (Scanpy). In the terminal, run any of the usage examples below:
- Seurat
conda activate seurat
~/download-labs.sh "https://github.com/NBISweden" "workshop-scRNAseq" "compiled/labs" "seurat" "work/labs"- Bioconductor
conda activate seurat
~/download-labs.sh "https://github.com/NBISweden" "workshop-scRNAseq" "compiled/labs" "bioc" "work/labs"- Scanpy
conda activate scanpy
~/work/download-labs.sh "https://github.com/NBISweden" "workshop-scRNAseq" "compiled/labs" "scanpy" "work/labs"Remember that data is only saved inside the /home/jovyan/work folder. If you run the labs outside this folder, all the labs and data files will be lost in case the JupyterLab server restarts or gets deleted (this can happen e.g. if it runs out of memory). It is recommended that at the end of each session you save the notebooks locally. You can do this by dowloading them through the File Manager interface available at the bottom of the project dashboard.
- When you are done with a particular notebook server, you need to delete it before you can create a new one. Click on the three dots under Actions, and then click on Delete. Wait a few minutes until you see the status Deleted. Now you can refresh the page and start over.
2 Option B: Run Docker Locally
2.1 Local Setup
If you don’t have Docker installed locally, please follow these instructions.
2.2 Images
Separate Docker images are made available for Seurat/Bioconductor and Scanpy toolkits. Below you find an overview of the available docker images. Note the space requirements!
| Topic | Image | Size (GB) |
|---|---|---|
| Seurat/Bioconductor | ghcr.io/nbisweden/workshop-scrnaseq-seurat:20250320-2311 |
13.1GB |
| Scanpy | ghcr.io/nbisweden/workshop-scrnaseq-scanpy:20250325-2256 |
16.9GB |
2.3 Seurat/Bioconductor
To avoid running out of memory, restart R (Session > Restart R) after each lab.
cd /path/to/labs  # replace this with the full path to the workshop compiled lab folder
docker pull --platform=linux/amd64 ghcr.io/nbisweden/workshop-scrnaseq-seurat:20250320-2311
docker run --platform=linux/amd64 --rm -p 8787:8787 -v ${PWD}:/home/jovyan/work ghcr.io/nbisweden/workshop-scrnaseq-seurat:20250320-2311
Do not close the terminal! In the browser, go to localhost:8787.
Inside RStudio, the script download-scripts-lab.sh is provided that will download the corresponding labs. It creates a labs folder with .qmd files. In the terminal, run the commands below:
- Seurat
conda activate seurat
~/download-labs.sh "https://github.com/NBISweden" "workshop-scRNAseq" "compiled/labs" "seurat" "work/labs"- Bioconductor
conda activate seurat
~/download-labs.sh "https://github.com/NBISweden" "workshop-scRNAseq" "compiled/labs" "bioc" "work/labs"
Navigate to /home/jovyan/work/labs/ and open the .qmd files.
2.4 Scanpy
To avoid running out of memory, restart the kernel (Kernel > Restart Kernel) after each lab.
cd /path/to/labs  # replace this with the full path to the workshop compiled lab folder
docker pull --platform=linux/amd64 ghcr.io/nbisweden/workshop-scrnaseq-scanpy:20250325-2256
docker run --platform=linux/amd64 --rm -p 8888:8888 -v ${PWD}:/home/jovyan/work/work ghcr.io/nbisweden/workshop-scrnaseq-scanpy:20250325-2256
Do not close the terminal! In the browser, go to localhost:8888. Use the following credentials to log in to the JupyterLab server:
Password:
scrnaseq
Inside JupyterLab, the script download-scripts-lab.sh is provided that will download the corresponding labs. It creates a labs folder with .ipynb files. In the terminal, run the commands below:
conda activate scanpy
~/work/download-labs.sh "https://github.com/NBISweden" "workshop-scRNAseq" "compiled/labs" "scanpy" "work/labs"
Navigate to /home/jovyan/work/labs/ and open the .ipynb files.


