We will teach you two different ways to connect to PDC. From PDC’s point of view, it doesn’t matter which one you use, and you can change whenever you want to or even use both ways simultaneously. The first one is a text-based SSH connection, and the other one is a graphical remote desktop. The latter one is useful if you need to view images or documents in GUI programs without having to first download the image/document to your own computer first. Since it is using graphics, it will require you to have an internet connection that is good and stable.
The reason we will teach you two ways is that some parts of this course will require you to view plots and images, and adding an additional download step would just unneccesarily complicate things.
1 SSH connection
Let’s look at the text-based SSH approach first. This type of connection work just fine even on slow internet connections since it only transmitts small amounts of text when you work with it. You will need a terminal and an SSH program to do this, which is fortunately included in most major operating systems:
- Linux: Use Terminal (Included by default)
- OSX: Use Terminal (Included by default)
- Windows: Use Powershell or Command prompt, both should be installed by default
The guide below is based on PDCs official instructions.
1.1 Setting up SSH keys
(If you already have done this once, please proceed to the next section instead.)
Before you can connect to PDC, you will have to create SSH keys and tell PDC which key they should allow you to login with, and which computer it should be allowed to be used from. You will only have to create and register SSH keys once. Start by opening your terminal program (see list above) and follow these steps:
Generate a key pair.
ssh-keygenand accept the default names it suggests by just pressing enter on the question about file in which to save the key. When it asks for a password, provide the password you will use to unlock the key each time you use it. Repeat the password when asked to in the next question. Once that is done it will say something like
user@computerName ~ $ ssh-keygen
Generating public/private ed25519 key pair.
Enter file in which to save the key (/home/user/.ssh/id_ed25519):
Enter passphrase (empty for no passphrase):
Enter same passphrase again:
Your identification has been saved in /home/user/.ssh/id_ed25519
Your public key has been saved in /home/user/.ssh/id_ed25519.pub
The key fingerprint is:
SHA256:6T19rVfxVndEpmHHY0vZc8/Xu03iDBYjS04//rOOvks user@computerName
The key's randomart image is:
+--[ED25519 256]--+
|              oo*|
|             . @=|
|              +oB|
|         .+ o  oO|
|        S+ + o  O|
|       . .o.= .o=|
|        . ooE=.+=|
|           o.o+oo|
|           .===+ |
+----[SHA256]-----+
The cool thing with SSH keys (public-key cryptography) like this is that they consist of two parts. One is the public key, which you can publish on the internet for everyone to see. The other part is the private part, which should be kept hidden from everyone, like a password. The public key is given to, in this case, PDC and they will let anyone who has the private key in. Print your public key to the terminal and copy the text so that you can use it in the next step.
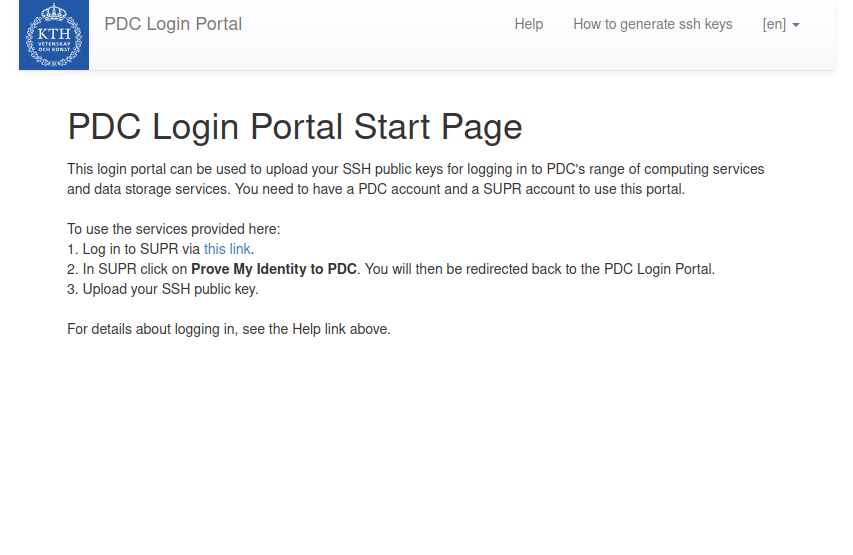
cat ~/.ssh/id_ed25519.pubTo register our public key, we will go to PDC login portal. Following a link from that page, you will login by first logging in to your SUPR account and then validating your identity to PDC through SUPR.
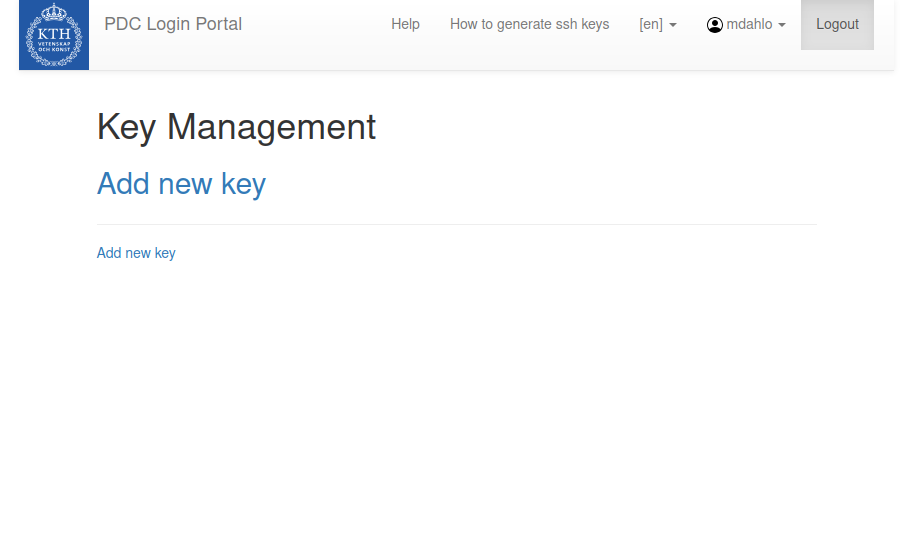
Press Add new key
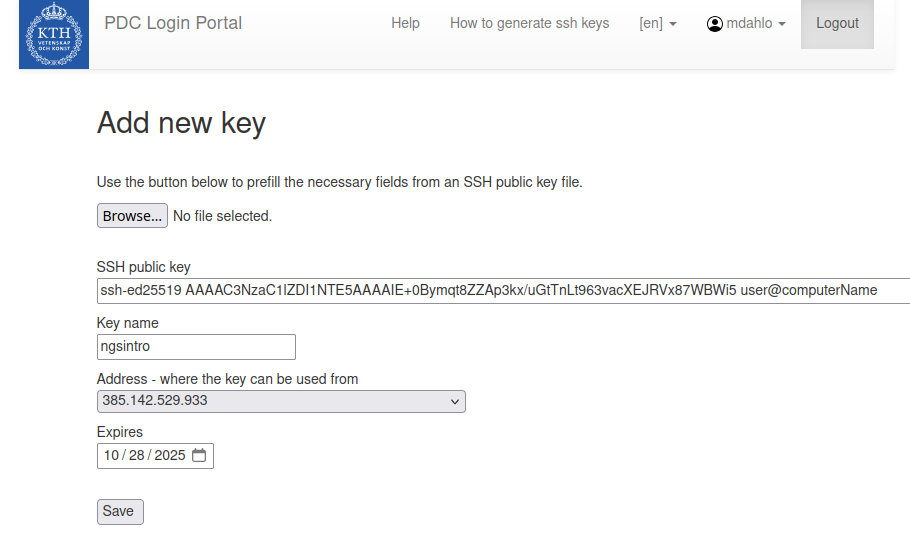
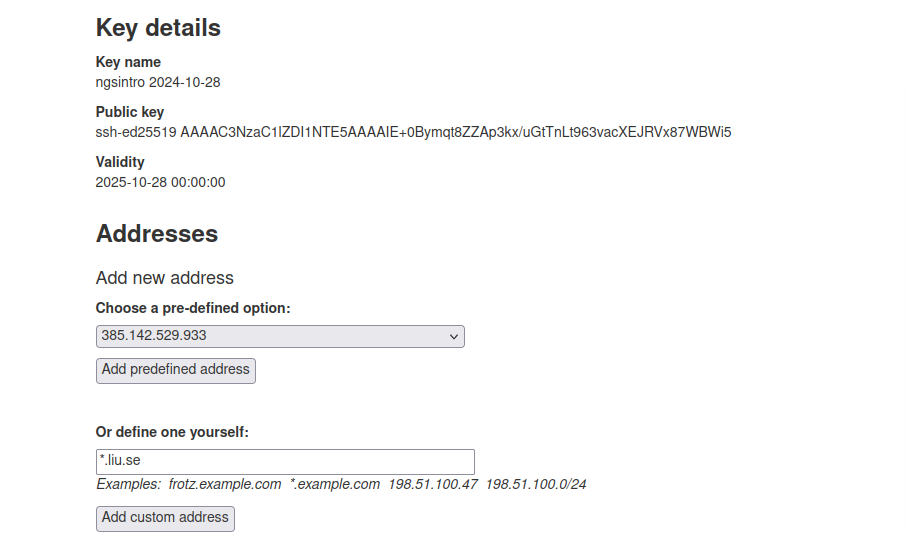
Paste the public key content you printed to the terminal with cat before into the SSH public key field in the form, and give a Key name of your choosing, then press Save.
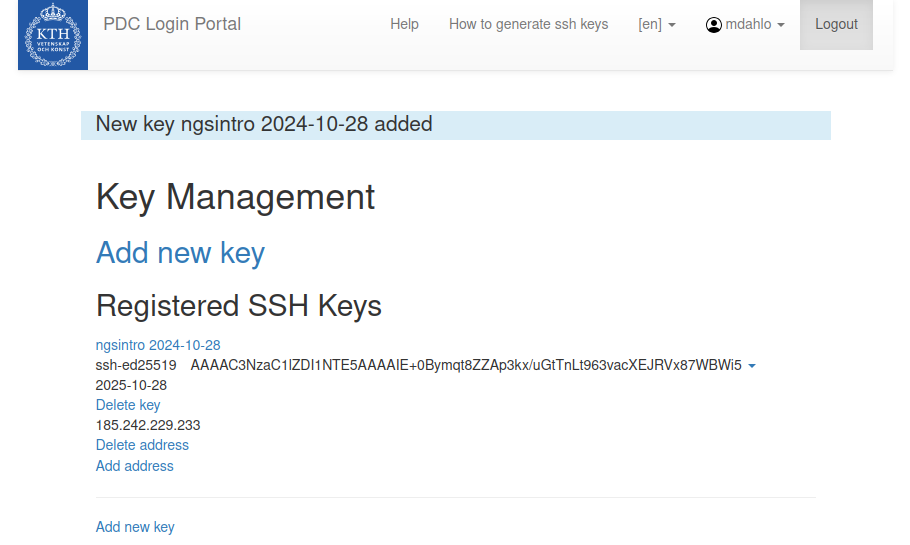
You have now added your public key and told PDC that it should be allowed to login using this key when you are connecting form the IP (385.142.529.933 in the screenshot above) you have at the moment. Since you might get new IPs for your computer each time you connect to the internet, we will have to add a broader list of allowed IPs for this key. Press Add address on the entry for the key you just added.
Add *.liu.se to the field define one yourself. This will allow you to use this key as long as you are connecting from anywhere at Linköping university. If you want to use this key from your home university in the future you can add a similar pattern that matches your home university’s (or internet provider) hostname (e.g. *.uu.se, *.kth.se or *.telia.com).
1.2 Connecting to PDC using SSH
If you have problems connecting to PDC even if you have set up you SSH keys in the step above, please make sure your computer has not changed it IP address since you defined allowed addresses in the PDC login portal. Make sure that the IP range or hostname pattern you have there allows your current IP/hostname
Where username is mentioned, change to your PDC user name.
Fire up the available SSH program and enter the following:
ssh username@dardel.pdc.kth.seEnter your password when prompted. As you type, nothing will show on the screen. No stars, no dots. It is supposed to be that way. Just type the password and press enter, it will be fine.
Now your screen should look something like this:
user@computerName ~ $ ssh username@dardel.pdc.kth.se
Enter passphrase for key '/home/user/.ssh/id_ed25519':
Last login: Mon Oct 23 21:11:35 2024 from 385-142-529-933.bredband.obe.net

     --== Welcome to Dardel! ==--

username@login1 ~ $
Now you are connected to PDC and can start working.
2 Remote desktop
You can work on PDC interactively through a graphical-user-interface (GUI) desktop environment using ThinLinc.
There is a ThinLinc server running at one of the login nodes which allows users to run a remote desktop. It can be reached using the ThinLink client, following these steps:
Download and install ThinLinc, https://www.cendio.com/thinlinc/download/
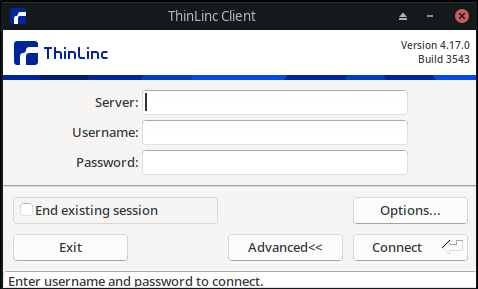
Start ThinLinc.
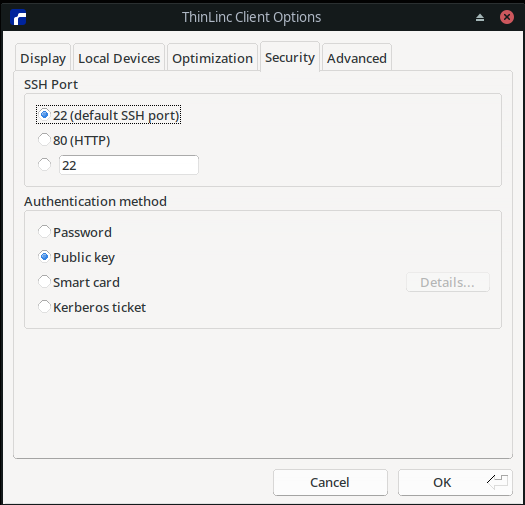
Press
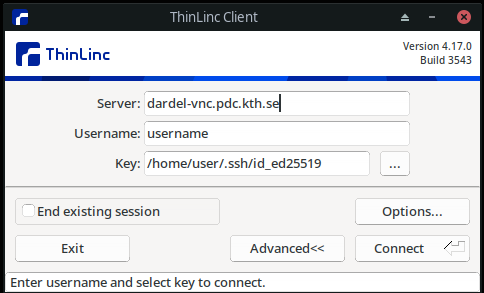
Options, select theSecuritytab and select authentication methodPublic key.Enter server
dardel-vnc.pdc.kth.se, your PDC username, and the path to your private SSH key.Press
Connect, and enter the password to unlock your SSH key when asked.When you are done with working with the remote desktop, press the power icon in the top-right corner of the screen and select
Log Out.
For more detailed instructions, please look here: https://www.pdc.kth.se/support/documents/login/interactive_hpc.html
