Overview
Teaching: 15 min
Exercises: 15 minQuestions
How do you get started with versioning using Git on the web?
Objectives
Creating repositories on GitHub
How to record (commit) changes
Browsing changes
Creating branches
About this episode
We will practice creating a new repository using the web interface, committing changes to it, browsing the changes, creating branches, and more. This is everything you need to do basic file management, though you’ll probably want something faster to use. Still, it can be good for quick edits and contributions.
Step 1: Create a repository with a README and a license
You start off by creating a repository on the web. In fact, we usually end up doing this on the web, no matter how you do your daily work. The important questions are who is the owner and what is the name of the repository.
Make sure that you are logged into GitHub via your browser.
To create a repository we either click Repositories in the top menu, and then on the green button “New” (to the right), or click on the +-menu (top right corner) and select New repository:
Yet another way to create a new repository is to visit https://github.com/new directly.
We then land at the following form. Please fill it out, name the repository analysis-recipe, add a description, ensure that Public is set, set Initialize this repository with a README and choose a license, e.g. Creative Commons Zero. If you don’t find a suitable license, there is an optional step below where you can learn how to add your own. When done, click on the green button Create repository at the bottom of the form.

- A note on Public versus Private: If you know that the repository you create is for your own purpose only, or you know that there might be content that is ‘sensitive’, you set it as Private. However, if this repository is going to be shared with the world, set it as Public. A repository doesn’t need to be public in order to collaborate on the content, collaborators can be added to a private repository as well.
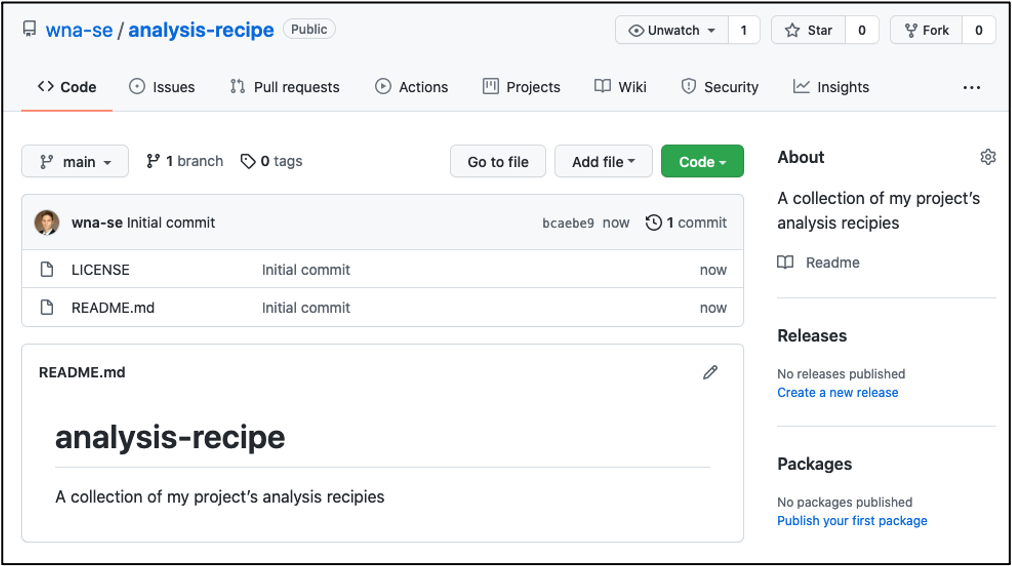
And now we have a repository with a README and LICENSE and one commit:
Step 2: Create a new file
We can easily add new files from the web interface.
Create a file, e.g. analysis.md (the “.md” ending signals that this is in Markdown format):
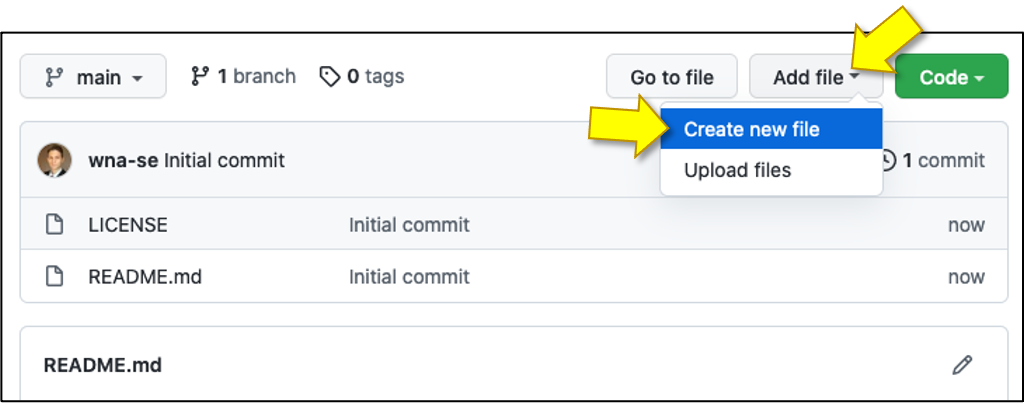
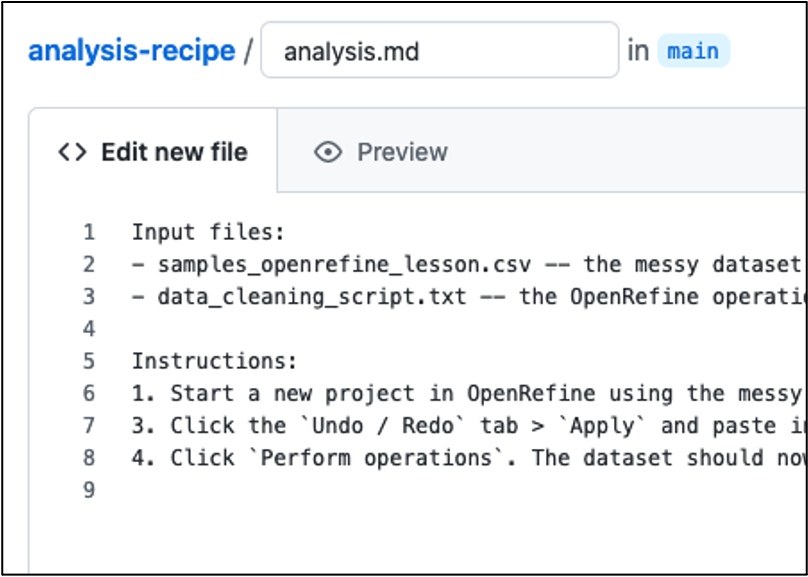
In the new file you can share a recipe – for example the necessary steps to run an analysis (or cooking or something else). You can also copy-paste this as a starting point:
Input files:
- samples_openrefine_lesson.csv -- the messy dataset from the OpenRefine lesson
- data_cleaning_script.txt -- the OpenRefine operations you've extracted

Output files:
- samples_openrefine_lesson_clean.csv -- the clean dataset resulting from the OpenRefine lesson

Instructions:
1. Start a new project in OpenRefine using the messy dataset you downloaded before (`samples_openrefine_lesson.csv`). Give the project a new name.
2. Click the `Undo / Redo` tab > `Apply` and paste in the contents of the data_cleaning_script.txt file you just created with the JSON code.
3. Click `Perform operations`. The dataset should now be the same as your other cleaned dataset.
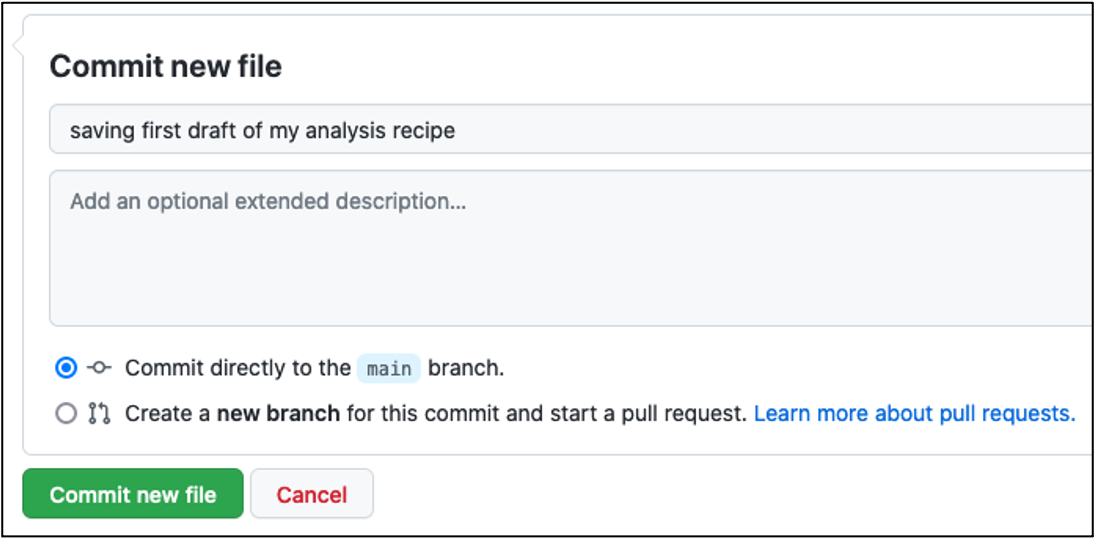
Click on Commit changes, then add a commit message (and possibly also an description, with more details) and click on Commit changes (save):
Good commit messages
- What has changed is more useful than which file has changed
- Sometimes we forget to document why something was changed
- Many projects start out as projects “just for me” and end up to be successful projects that are developed by 50 people over decades.
- Write commit messages in English that will be understood 15 years from now by someone other than you.
- “My favourite Git commit”
- “On commit messages”
- “How to Write a Git Commit Message”
Step 3: Modify a file
We can also easily modify files on the web.
Now improve the recipe by adding an ingredient or an instruction step:
- Click on the file.
- Click the “pen” icon on top right (“edit this file”).
- Add e.g. a 4th step in the instructions:
```
- Save the dataset as
samples_openrefine_lesson_clean.csv```
- Save the dataset as
Click on green button Commit changes…, write a commit message, commit:
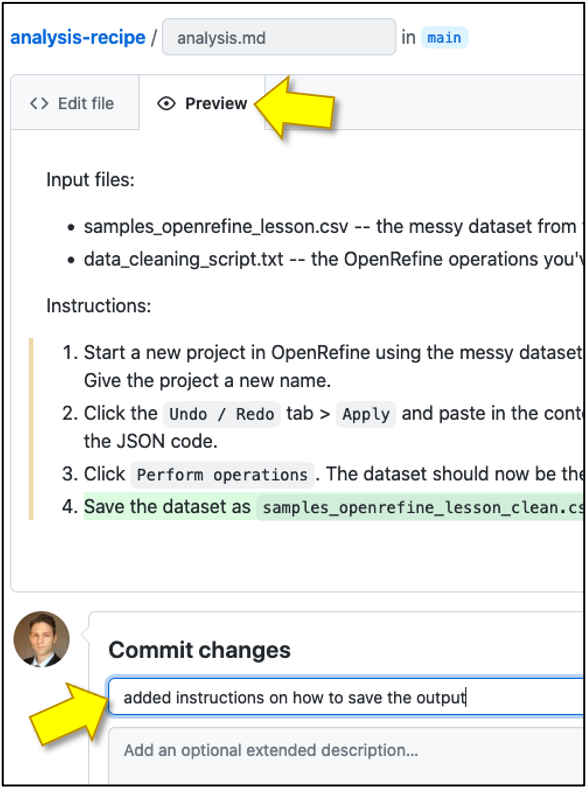
Once you have done that, go back to the repository view (click on the repository name) and browse your commits by clicking on Commits:
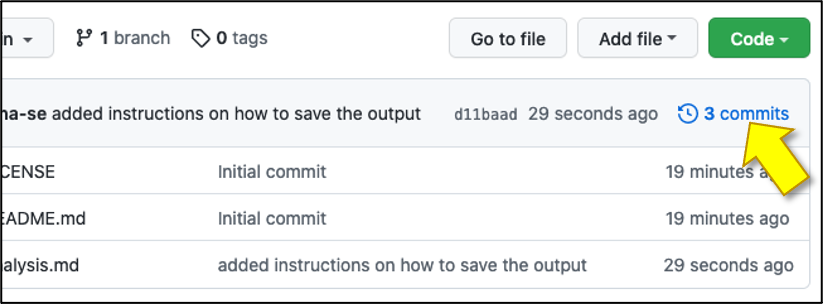
In my example I got:

Step 4: Create a new branch
A branch is a separate line of development. They are useful when you have multiple things going on at once and you don’t want them to get in the way of each other. It also allows collaboration, as we will learn in a later episode.
-
Create a new branch named
experiment: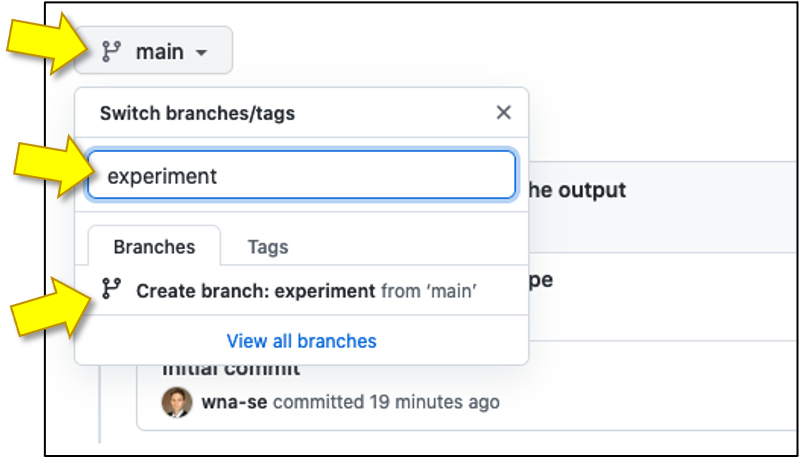
-
Modify your recipe on the newly created branch, e.g. add an explanation what the file is about in the beginning of the file analysis.md:
This is the recipe on how to clean a dataset in OpenRefine. - Make sure you commit to the new branch:
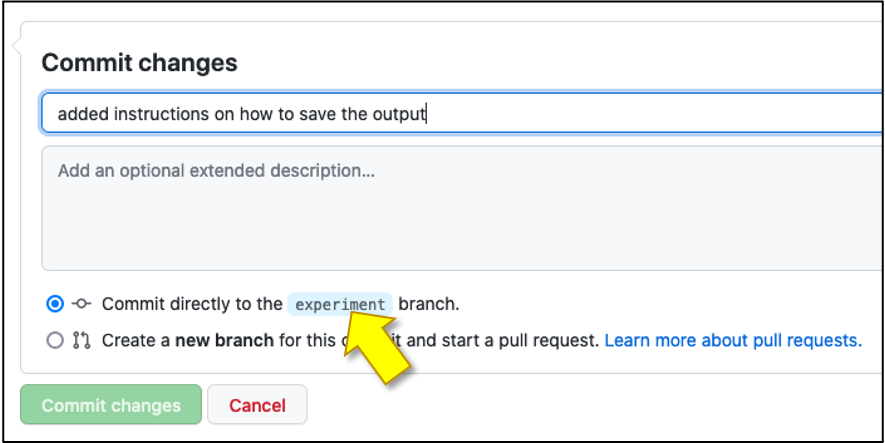
- Then switch back to the
mainbranch and browse your recipe there, notice that this branch doesn’t have the modification that theexperimentbranch has.
Step 5: Repository insights and settings (optional)
GitHub gives us many insights into our repository. Nothing here is really specific to GitHub (everything can be done with regular Git), but they make it especially easy to see. The network lets you see how all commits and branches relate.
Have a look at the network, hover over the dots in the graph (commits). The network view is the best way to get an overview of your branches and commits, and it never hurts to come back here and check:

Step 6: Adding a license to an existing repository (optional)
This is an optional step to show how we can add a license to an existing repository.
- Visit https://choosealicense.com/ and let it guide you.
- If you don’t find a suitable license, choose among https://choosealicense.com/appendix/.
- Once you have chosen, click on the license name, and you can enter your GitHub repository URL (top right) which will open a pull request (change request) to the repository:
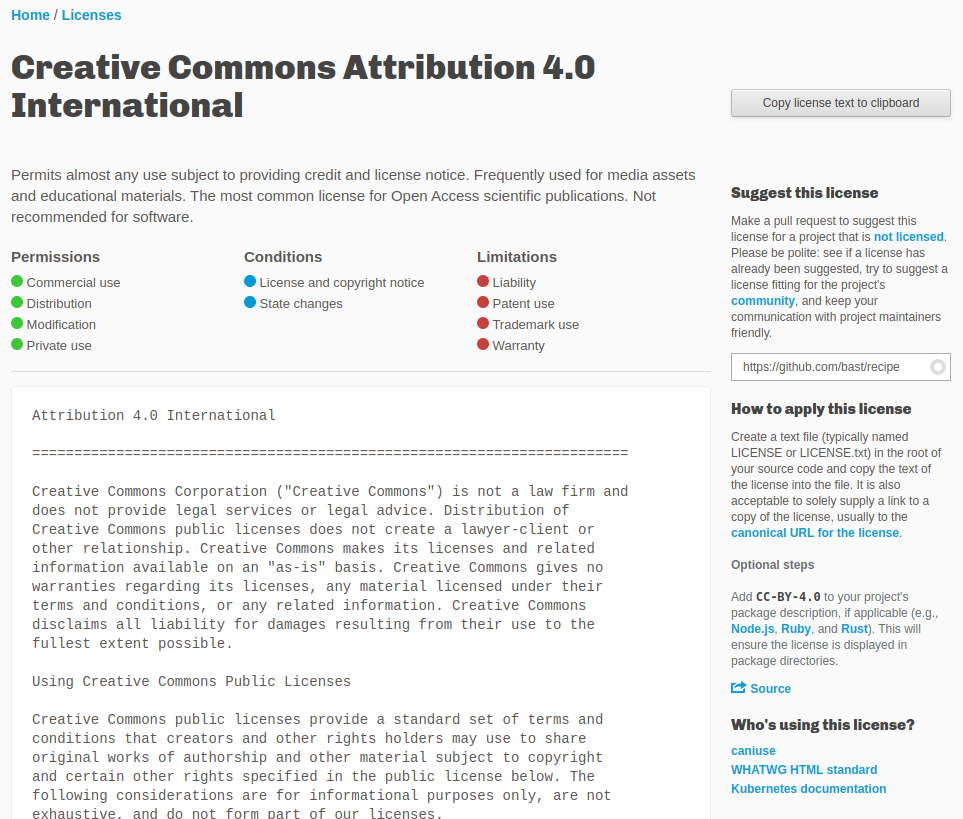
- If you already have a license, but want to change it, you can copy the license text to clipboard (button on top) and modify your LICENSE file in the repository.
Step 7: How can we merge branches? (optional)
This is an optional step which the instructor may demonstrate and discuss:
We made a branch, separate from the original branch main.
What happens when we decide we like that change, and want to take it
into use? We will soon see the magic of Git.
First browse to the overview of all branches:
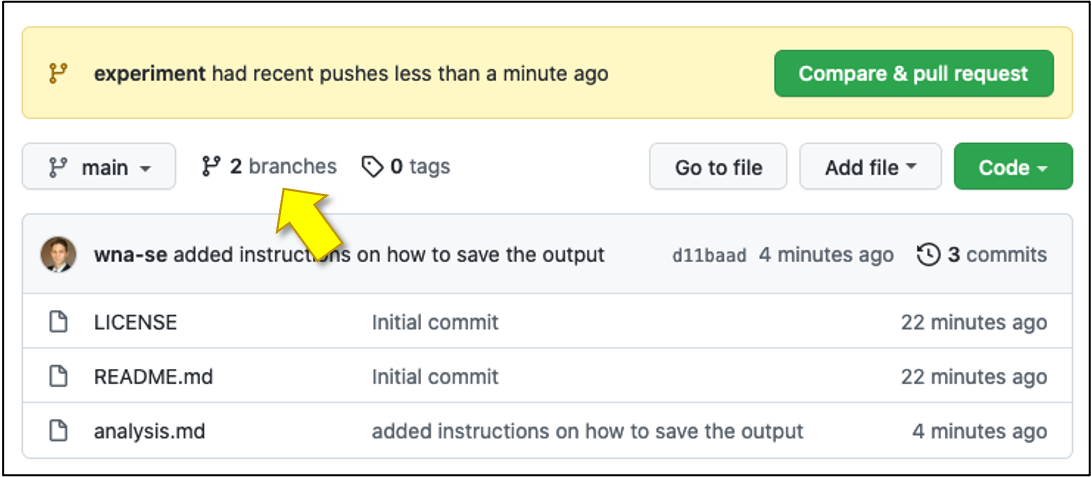
Now, to initiate a merge (request), click on New pull request:
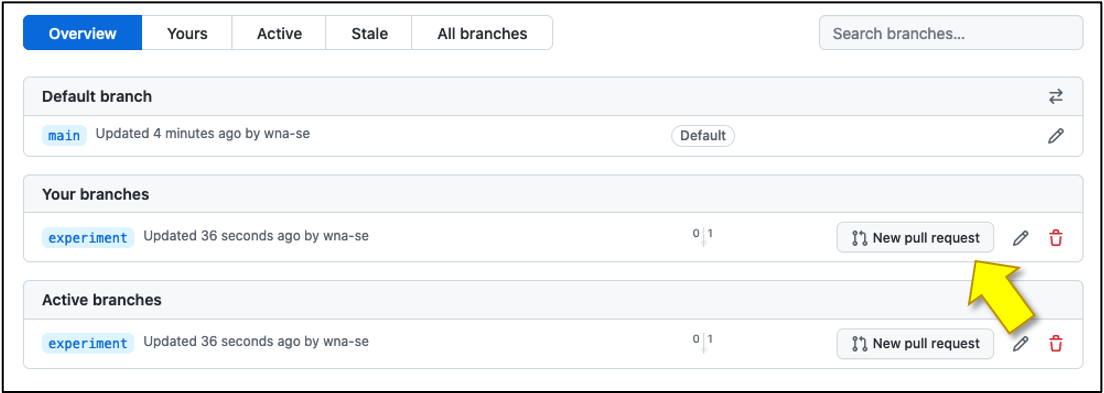
Scroll down and inspect what has changed, notice that additions compared to main branch is in green and has + signs (if we had done a deletion, it would be marked in red and have - sign):
Now, create the pull request. Once a “pull request” (think of it as a change proposal) is open, it can be reviewed and merged. We will return to “pull requests” when we later discuss how to contribute changes.