usethis::use_git_config(
user.name = "Your Name",
user.email = "you@example.org"
)0.1 Install git
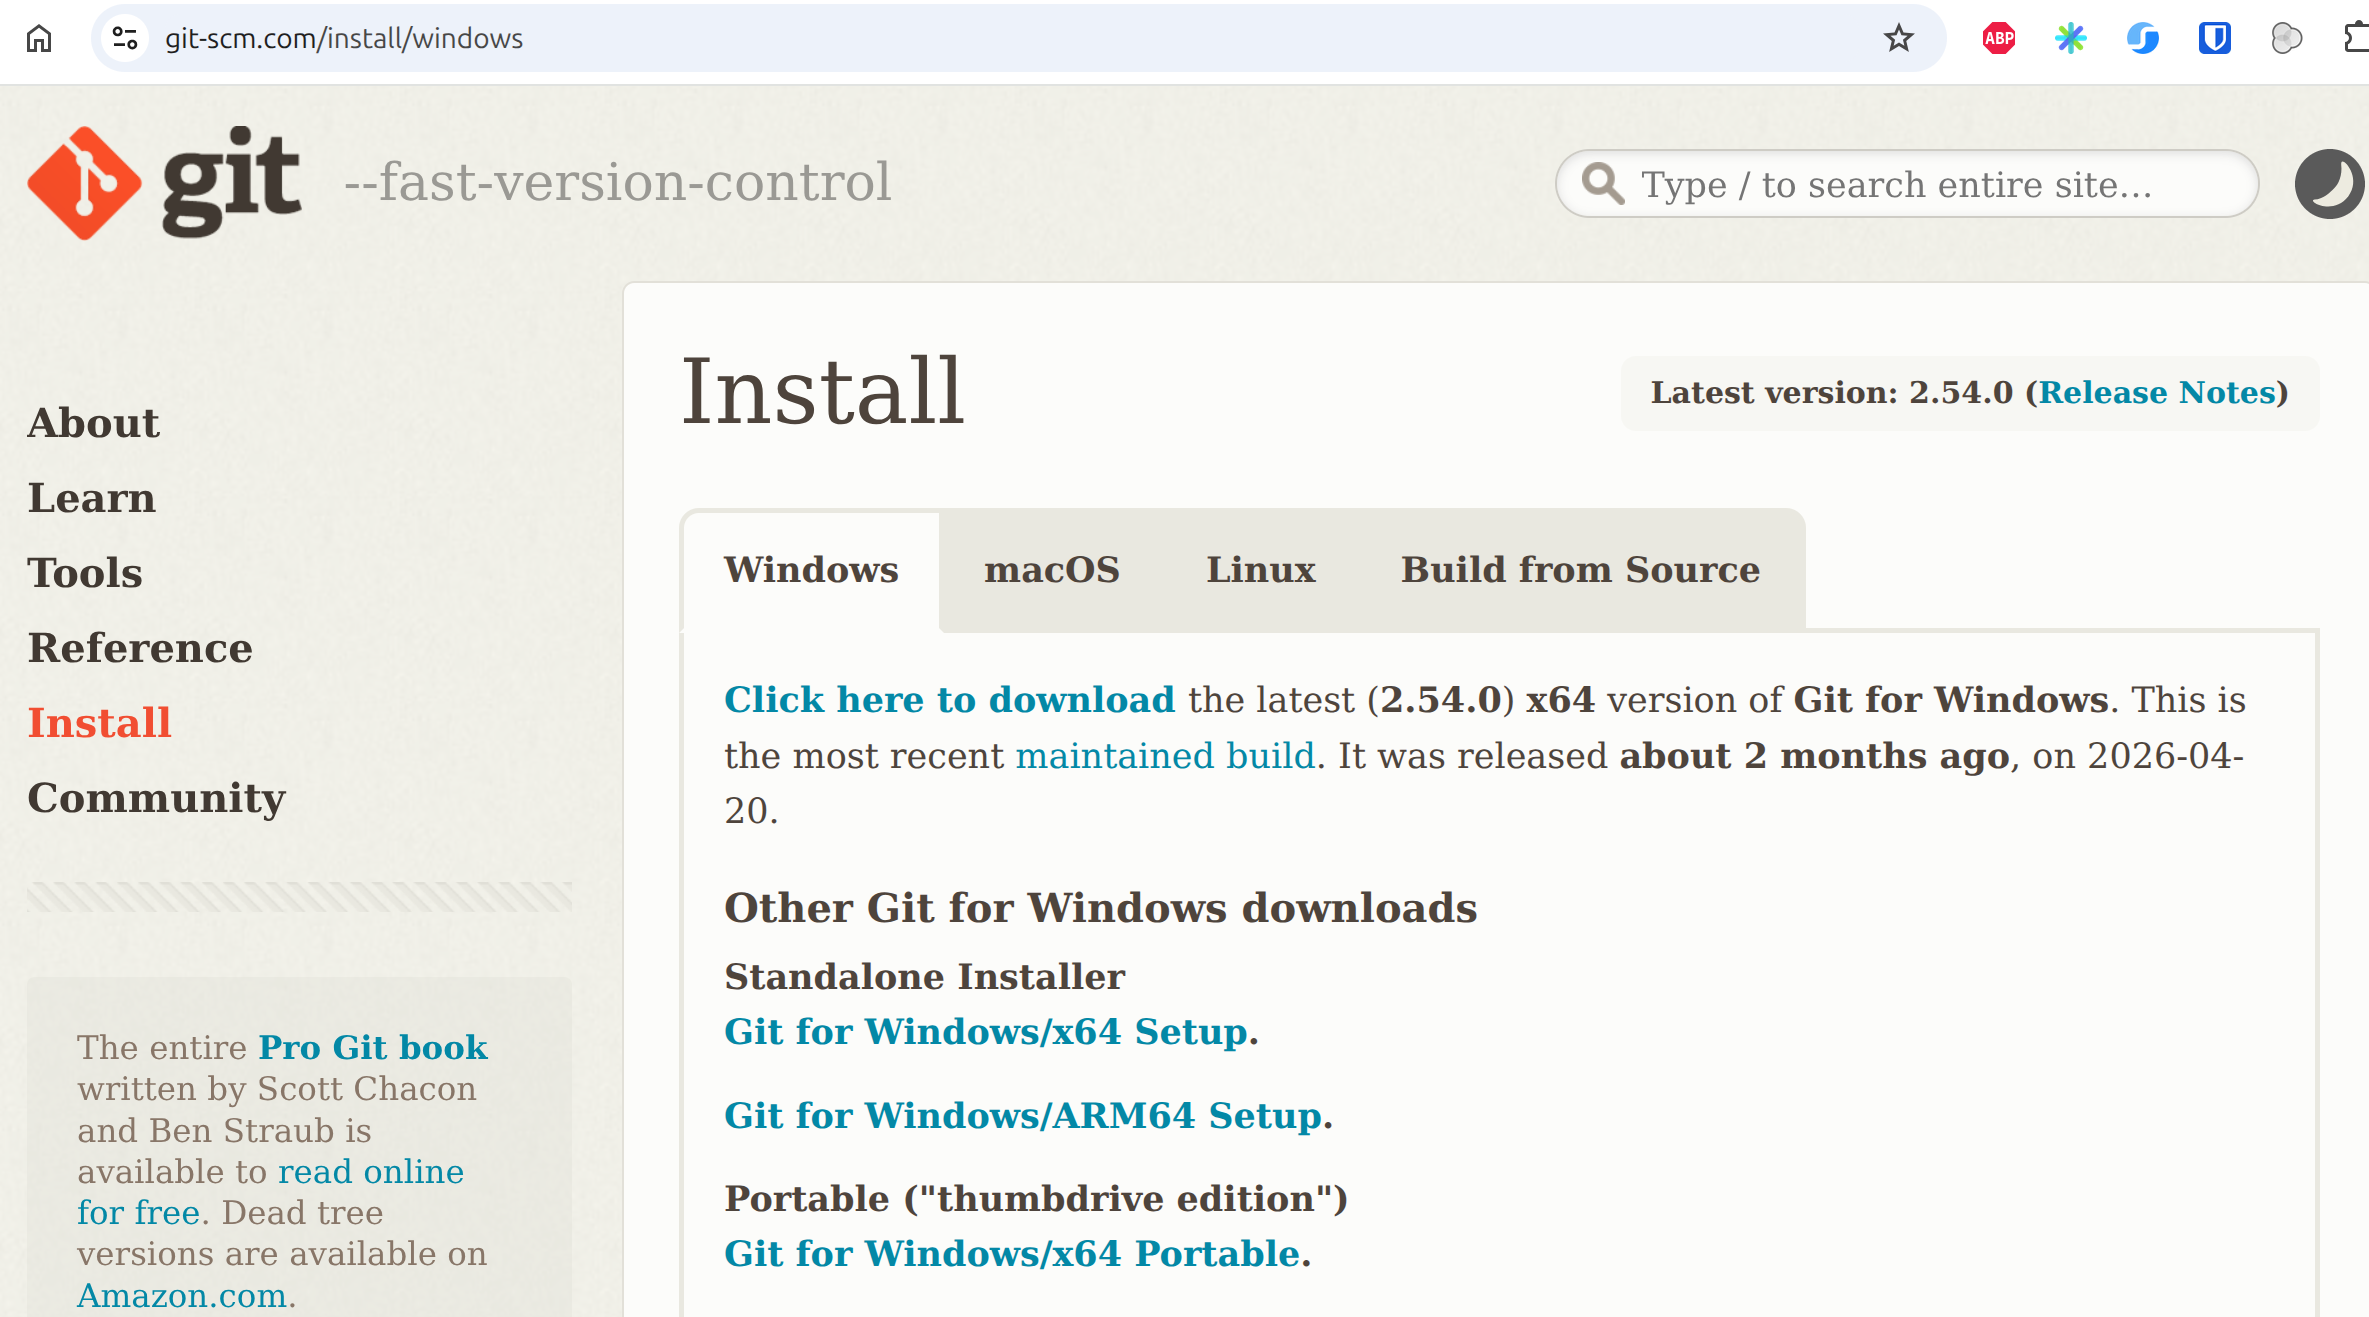
If you don’t have git installed on your computer, go here and follow the installation instructions:
0.2 Configure git
Before your first commit, git needs to know who you are. It stamps every commit with a name and email — this is not a login, just the author label baked into the commit. Set it once, globally:
git config --global user.name "Your Name"
git config --global user.email "you@example.org"
If you prefer to do it the R way, there’s of course a package for this: usethis
Tip
Use the same email you use (or will use) on GitHub — it’s how GitHub links your commits to your account later.
If you want, you can also update your default branch name. Git uses master as default name, while GitHub has switched to main,
git config --global init.defaultBranch mainCheck what you’ve set at any time with:
git config --listThere are different ways to use git locally on your computer. Below we will introduce two ways, the command line or through Positron. Try either or both. You can also mix using them. Alls settings you have configured are global, and are applied regardless if you interact with git through the commandline or through Positron.
1 The basics - Command line
1.1 Initiate an empty git repository
git initYou can see that git has added a hidden folder called .git in the root folder where you initiated the git repository. To check on the status of the repository, you can run:
git statusAs we have no files in this folder yet, git will just tell you something like this:
On branch main

No commits yet

nothing to commit (create/copy files and use "git add" to track)
Tip
If you try to run git status in a non-Git directory, it will say that it is not a git repository. Git looks for the hidden directory .git/ where all information is stored. This hidden directory contains all information and settings Git needs in order to run and version track your files. This also means that your Git-tracked directory is self-contained, i.e. you can simply delete it and everything that has to do with Git in connection to that directory will be gone.
1.2 Create a file
Create a file with some random content, either in an editor or just using the command line:
echo "Content to my file" > random.txtOnce you have done that, run git status again. It will tell you that there are files in the directory that are not version tracked by Git.
1.3 Add and commit changes
We will now commit the untracked files. A commit is essentially a set of changes to a set of files. Preferably, the changes making out a commit should be related to something, e.g. a specific bug fix or a new feature.
- Our first commit will be to add the copied files to the repository. Run the following (as suggested by
git status):
git add random.txtRun
git statusagain! See that we have addedrandom.txtto our upcoming commit (listed under “Changes to be committed”). This is called the staging area, and the files there are staged to be committed.We are now ready to commit! Run the following:
git commit -m "Add random file"The -m option adds a commit message. This should be a short description of what the commit contains. If you omit the -m flag it will open a text editor where you can write the message in.
- Run
git statusagain. It should tell you “nothing to commit, working directory clean”.
1.4 Change a file
Let’s repeat this process by editing a file!
Open up
random.txtin your favourite editor and add a bit more text to the file.Run
git status. It will tell you that there are modifications in one file (random.txt) compared to the previous commit. This is nice! We don’t have to keep track of which files we have edited, Git will do that for us.Run
git diff random.txt. This will show you the changes made to the file. A-means a deleted line, a+means an added line. A few lines before and after the changes are also shown for context.Now let’s add and commit the changes to this file.
You can track all changes made to files that are version controlled using git log:
git log
NoteQuick recap
These are the git commands we have used this far:
git inittells Git to track the current directory.git statusis a command you should use a lot. It will tell you, amongst other things, what files are changed, if they are staged or commit.git add <file>adds a file to the staging area.git commitcommits the file to git.git diff <file>shows the difference between the commited file and unstaged file.git logshow a log of all commit details.
2 The basics - Positron
2.1 Start a new project in Positron
Click on Initialize Git repository. Creates a hidden .git folder in your project and a README.md file.
2.2 Create a file
Add a new file to the folder and write something in it.
2.3 Add and commit changes
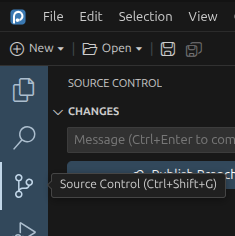
Now you want to first add your changes to the staging area. Do this by going to the Source Control tab in on the left hand side in Positron. There you will see a list of all files with or without changes. The small U to the right of the file means the changes have not been staged.
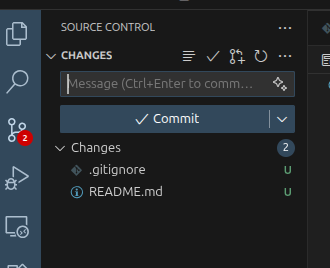
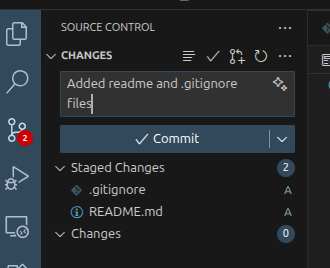
Click on the small plus next to the file to stage the file. Do this with all the files you want to later commit. Once it’s staged it will be marked with a small A. Now you can add a short but informative commit message, and commit your changes. They are now saved in git.
2.4 Change a file
Try adding a few more files and change some existing ones. If you change a file you can click on the file in the source control tab, and see the difference to the file that is already committed, and the new changes.
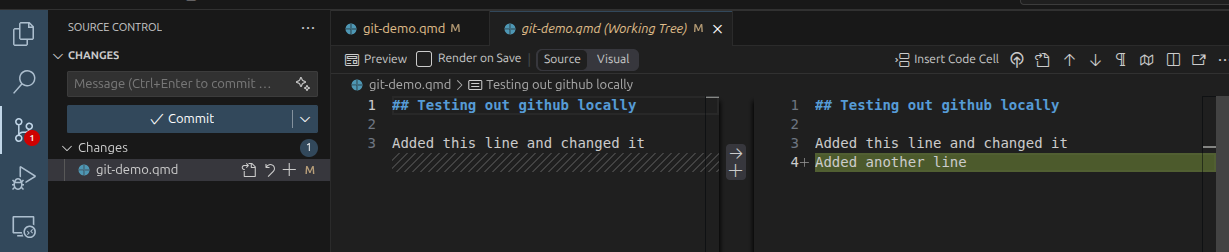
Stage and commit the changes. Now, let’s look at the history. In Positron you can look at the git graph and see all changes made to files at certain commits:
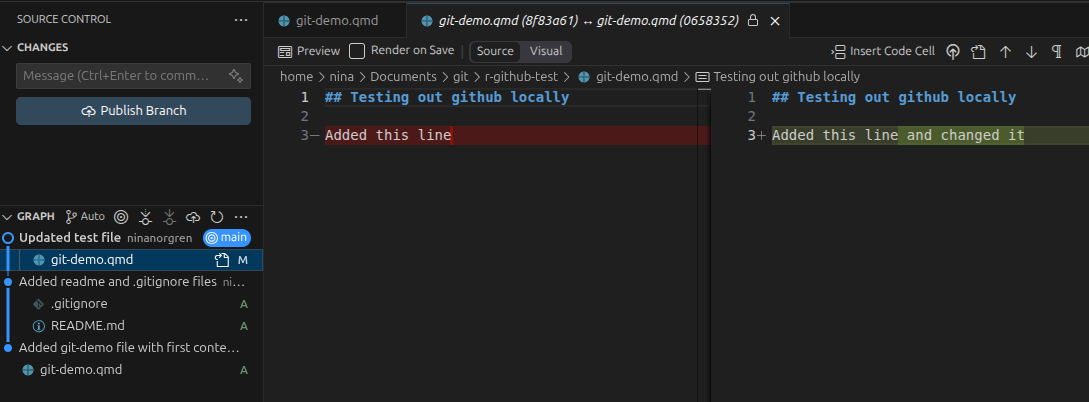
All those files are now version controlled!
3 Keeping order
So far we’ve only added things. Now let’s practise taking them back.
3.1 Unstage a file (but keep the edit)
- Open
random.txt, add a line, and stage it:
git add random.txtRun
git statusand confirm it’s listed under “Changes to be committed”.Now unstage it:
git restore --staged random.txt- Predict before you run: is your new line gone, or just unstaged? Run
git statusto check.
The line is still there, the file is simply back to “modified but not staged”. git restore --staged restored the staging area from the last commit; it never touched your working file.
TipIn Positron
Hover the staged file in the Source Control panel and click the − (minus) to unstage it — same as git restore --staged. Your edit stays put.
3.2 Discard an unstaged change (this one bites)
- With that edit still unstaged, discard it:
git restore random.txt- Run
git status, then open the file.
This time the edit is gone. The bare git restore restored the working file from the staging area and there was nothing staged, so it reverted to the last commit.
Important
Same command, two trees. git restore --staged <file> rewinds the staging area (your edit survives in the file). git restore <file> rewinds the working file (your edit is discarded). The flag decides which one you’re undoing. There’s no undo for the second one, the change wasn’t committed, so git has nothing to bring back.
TipIn Positron
Hover the file and click the Discard Changes (revert) icon to throw the edit away, same as git restore. Positron asks you to confirm, because, as on the command line, there’s no getting it back.
4 Telling git what to ignore
Some files should never be tracked: editor junk, rendered output, large data, secrets, etc. Git keeps a full copy of every version of every tracked file, so ignoring the right things keeps your history clean and your repo small.
4.1 Create some junk, then ignore it
- Make a couple of files you would never want in version control:
echo "old session" > .Rhistory
echo "rendered" > report.html
Run
git status. Git wants to track both.Create a file called
.gitignorein the repository if you don’t already have it, with these contents:
# R session junk
.Rhistory
.RData
.Rproj.user/

# Rendered output
*.html- Run
git statusagain.
The junk has vanished from the list. Git now ignores anything matching those patterns. (Note: you do want to commit .gitignore itself, it’s part of the project.)
5 Working on parallel lines: branches
A branch lets you work on something without disturbing your main line of work. The mental model that makes everything else click: a branch is just a movable pointer to a commit. Making a commit moves the current pointer forward one step. That’s why branching is instant, git writes a tiny pointer, it doesn’t copy your files.
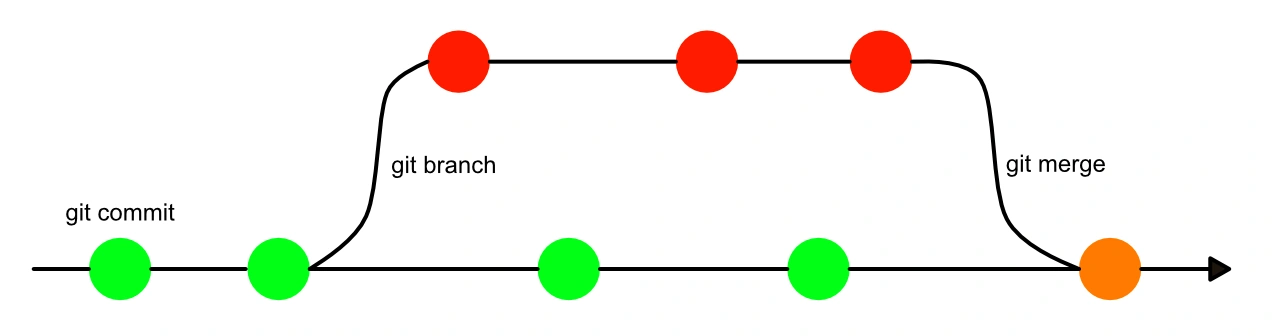
Useful commands for branches from terminal:
git branch <name of branch>: Create a new branch.git branch: See list of branches. Current branch marked with *.git switch <name of branch>: Move to branch.git merge <name of branch>: Merge the branch you are currently on with the branch named in command.
5.1 See where you are now
- Draw the current history:
git log --oneline --graph --allUsing the --onelin flag compresses the commit history to just one line for readability. Note the labels — main and HEAD are both pointing at your latest commit. HEAD means “the branch I’m currently on”.
5.2 Make a branch and commit on it
- Create a branch and move onto it in one step:
git switch -c experimentRun
git status(it tells you which branch you’re on) andgit branch(the*marks the current one).Make a change to
random.txtand commit it.Draw the graph again:
git log --oneline --graph --allWatch what moved: experiment advanced to the new commit, main stayed put. You just saw the pointer move.
5.3 Switch back and merge
- Go back to
main:
git switch mainOpen
random.txt. Yourexperimentchange isn’t here,mainnever moved.Merge the branch in:
git merge experiment- Draw the graph once more.
Because main hadn’t moved on its own, git just slid its pointer forward to catch up with experiment. This is a fast-forward merge, no new commit needed.
TipIn Positron
The current branch name sits in the status bar (bottom of the window). Click it to create or switch branches. The Git Graph view shows the same picture as git log --graph. Everything in this block works through those, but doing it on the command line first makes it obvious what the buttons are doing.
5.4 When git can’t decide: merge conflicts
A conflict isn’t an error. It’s git refusing to guess when two branches changed the same lines. You, not git, decide which version wins. This is the single most useful thing to have done once in a safe sandbox before it happens for real.
5.5 Set up two conflicting edits
Make sure you’re on
mainand thatrandom.txthas a known first line. Commit if needed so you have a clean starting point.Create a branch, change the first line one way, and commit:
git switch -c feature
# edit random.txt - change the first line to, say, "Hello from feature"
git add random.txt
git commit -m "Change greeting on feature"- Switch back to
mainand change the same line differently:
git switch main
# edit random.txt - change the same first line to "Hello from main"
git add random.txt
git commit -m "Change greeting on main"
Both branches now have a different version of the same line.
5.6 Trigger and resolve the conflict
- Merge:
git merge featureGit stops and tells you there’s a conflict. Run git status, it lists the file under “Unmerged paths” and, helpfully, tells you what to do next.
- Open
random.txt. Git has written both versions in, marked like this:
<<<<<<< HEAD
Hello from main
=======
Hello from feature
>>>>>>> feature
Edit the file by hand: keep the version you want (or combine them), and delete all three marker lines (
<<<<<<<,=======,>>>>>>>). If you use Positron it will remove them for you.Tell git you’ve resolved it, and complete the merge:
git add random.txt
git commit- Draw the graph:
git log --oneline --graph --allThis time merging the two diverged lines of work produced a real merge commit, you can see the two branches joining back together.
6 Additional reading and exercises
Want more? There’s tons of git resources out there. Below are a few of them with topics that might come in handy:
How to undo things
Tagging your work
Deep dive into branching
8 Forks and pull requests
Forking a repository on GitHub means creating a copy of the repository on your GitHub user. This can be very useful if you want to make some changes to a repository that you do not have push access to, for example. It is also a great way collaborate because it adds more backups of the repository and because of pull requests, which are a way of implementing your local changes to the source repository where the owner of the repository has the power to review and choose whether to accept them or not.
For example, in this RaukR course we have a repository for all the teaching materials that all teachers have forked, made changes to and then submitted a pull request back to the source repository.
To fork a repository you can either use the GitHub website of the repository you want to fork, or you can use usethis.
usethis::create_from_github(
  "https://github.com/<user name of owner>/<repository name>",
  destdir = "~/path/to/place/repo/",
  fork = TRUE
)
This command does a lot of things, from happygitwithr
- Forks the source repo on GitHub.
- Clones your fork to a new local repo. This configures your fork as the origin remote.
- Configures the source repo as the upstream remote.
- Sets the upstream tracking branch for main (or whatever the default branch is) to upstream/main.
- Opens a new Positron instance in the new local repo.
Remotes are connections for your repository, and being upstream means being a repository closer to the source than your repository, which is downstream (as it is a fork). So the sentence “Configures the source repo as the upstream remote” translates to adding a connection specifying that the source repository is where your repository came from. This connection is used to update your fork with any future changes that occur in the source repository.
8.1 Let’s get real!
We’re going to try a “real-world setup” where there are several collaborators working on a project. The source repository is the one that is owned by the maintainer of the project, and you will fork it to your own GitHub account, clone it to your local computer, make some changes and then submit a pull request back to the source repository. The repository contains Quarto code that generates a website, and the maintainer of the source repository will review your changes and decide whether to accept them or not.
The website in question is this one: https://ninanorgren.github.io/raukr-awesome-website/. As you might have guessed, ChatGPT did most of the work here (hence the emoji bonanza). But the main point here is for you to try out a situation where you need to fork a repository, make some changes and submit a pull request. This is a common workflow in open source projects.
The GitHub repository you will be working with is https://github.com/ninanorgren/raukr-awesome-website. The descriptions for the exercise is in the website itself, so familiarize yourself with it before you start. The maintainer of the source repository will review your pull requests and see if we can merge them.
If you want to use R and usethis to fork and clone the repository, here are a few useful commands:
usethis::pr_init(branch = "branchName")  # create new branch and switch to it
usethis::pr_push()  # push changes and open browser to submit pull request
There is a whole family of pr-* functions for both the person submitting the pull the request and the maintainer of the source repository that will review and accept/decline the pull request. I really recommend you read here if you think this is of interest!
8.2 Disclaimer
This might crash and burn… We’ll see!
8.3 Session
Click here
sessionInfo()R version 4.5.3 (2026-03-11)
Platform: x86_64-conda-linux-gnu
Running under: Ubuntu 26.04 LTS
Matrix products: default
BLAS/LAPACK: /home/roy/miniforge3/envs/r-4.5/lib/libopenblasp-r0.3.33.so; LAPACK version 3.12.0
locale:
[1] LC_CTYPE=en_US.UTF-8 LC_NUMERIC=C
[3] LC_TIME=en_US.UTF-8 LC_COLLATE=en_US.UTF-8
[5] LC_MONETARY=en_US.UTF-8 LC_MESSAGES=en_US.UTF-8
[7] LC_PAPER=en_US.UTF-8 LC_NAME=C
[9] LC_ADDRESS=C LC_TELEPHONE=C
[11] LC_MEASUREMENT=en_US.UTF-8 LC_IDENTIFICATION=C
time zone: Europe/Stockholm
tzcode source: system (glibc)
attached base packages:
[1] stats graphics grDevices utils datasets methods base
loaded via a namespace (and not attached):
[1] htmlwidgets_1.6.4 compiler_4.5.3 fastmap_1.2.0 cli_3.6.6
[5] tools_4.5.3 htmltools_0.5.9 otel_0.2.0 yaml_2.3.12
[9] rmarkdown_2.31 knitr_1.51 jsonlite_2.0.0 xfun_0.59
[13] digest_0.6.39 rlang_1.3.0 evaluate_1.0.5