Getting started
In this workshop you will use the classroom computers, so you’ll have all the necessary software installed and ready to run everything.
Briefly, conda allows users to run pieces of code just like the developer created them.
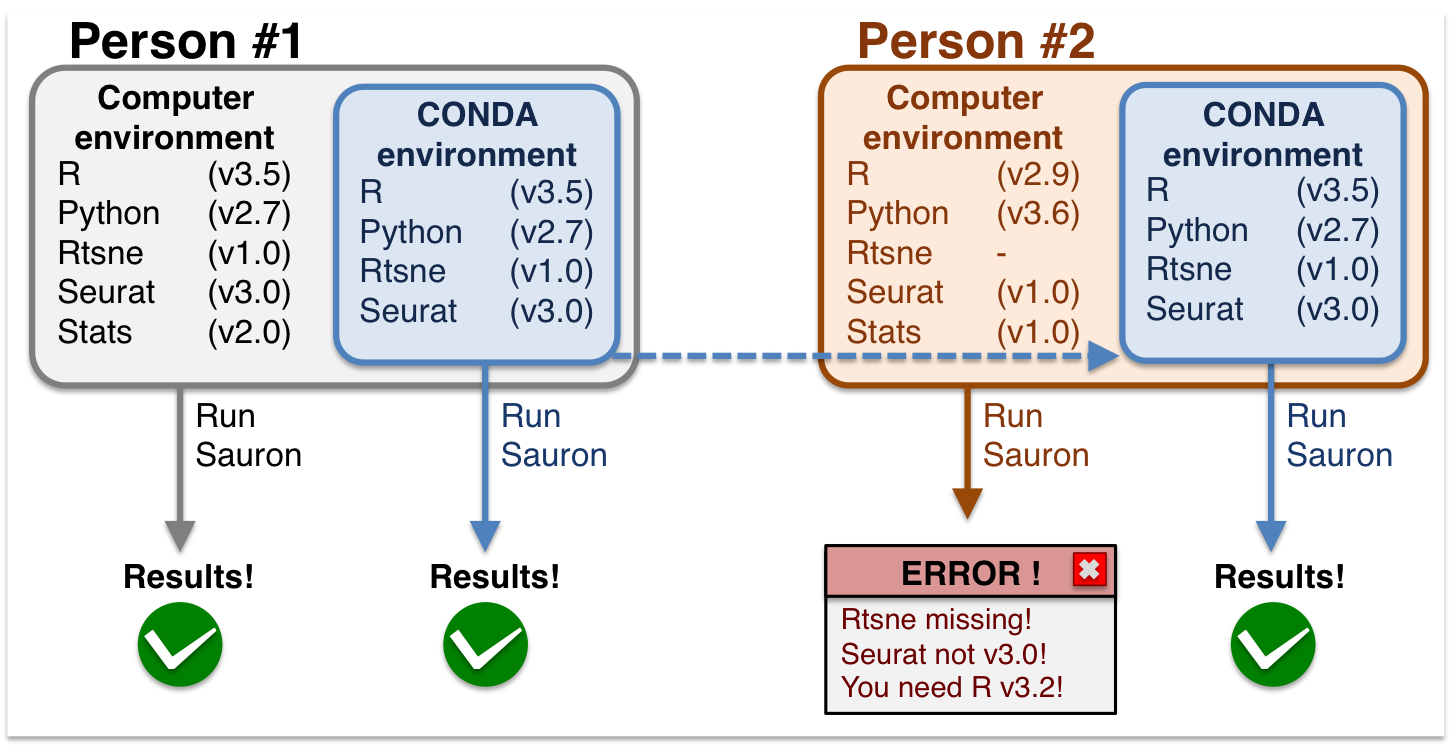
If you want to install the same software on your own laptop after the course, you can follow the instructions below to do so. These rely on Conda environments, a self-contained directory that you can use in order to reproduce all your results. Two of the required software are not available as Conda packages, please see the separate instructions for installing SingleR and CHETAH.
Briefly, you need to:
- Install Conda and download the
.yamlfile - Create and activate the environment
- Deactivate the environment after running your analyses
You can read more about Conda environments and other important concepts to help you make your research reproducible.
Install Conda and download the environment file
You should start by installing Conda. We suggest installing either Miniconda, or Anaconda if storage is not an issue. After installing Conda, download the course Conda file and put it in your working folder. Note that there is a separate environment.yaml for Mac and for environment_centos7.yaml for Linux .
Create and activate the environment
In terminal, cd to your working folder and create an environment called project_scRNA from the
environment.yaml file. This may take a few minutes:
conda env create -p project_scRNA -f environment.yaml
##Collecting package metadata: done
##Solving environment: done
##
##Downloading and Extracting Packages
##libcblas-3.8.0       | 6 KB      | ############################################################################# | 100%
##liblapack-3.8.0      | 6 KB      | ############################################################################# | 100%
##...
##Preparing transaction: done
##Verifying transaction: done
##Executing transaction: done
###
### To activate this environment, use
###
###     $ conda activate /my/file/path/project_scRNA
###
### To deactivate an active environment, use
###
###     $ conda deactivate
Then activate it:
conda activate ./project_scRNA
From this point on you can run any of the contents from the course. For instance, you can directly launch RStudio by
typing rstudio.
Deactivate the environment
After you’ve ran all your analyses, deactivate the environment by typing conda deactivate.